Any maps can be used in the interior: precise geographical or political, fantasy, ancient or super-modern - depending on what result you want to get.

The basic rule: there should not be many other decorative elements, and they should not distract attention to themselves. Let the world map in the interior become the main component, and the surroundings become a calm background for it.
As a rule, the map itself, that is, a drawing of the earth's surface, is placed on one of the walls, covering the remaining walls with neutral light shades, for example, beige, olive, white.

If the room is small, then the world map on the wall should not be multi-colored. It is best if the continents are indicated in one tone, the water surface in another, and these tones are not too bright.
This solution will help to visually enlarge the room. Typically, this option looks good in a room for any purpose - such as a bedroom, nursery or living room.

Photos in the interior of the rooms
Maps in the interior can be anything, for example, a map of your city or the city where you like to relax, a metro map or your region will not only decorate the interior, but can also serve its intended purpose - quickly find a particular locality or route required route.

An interesting idea is the visual division of space using maps. For example, in the work area - wallpaper with a map or diagram, and in the bedroom - any other type of decoration.
Try to use the colors that are used in furniture upholstery, curtains, and decorative elements of your interior.
Living room
Those who love to travel enjoy marking places they have already visited on maps and plotting future routes. For such people, cards in the interior have a special meaning.
If you paint the outlines of the continents on one of the walls, indicating individual cities, then you can make such marks directly on the wall. The result is an interactive map that will serve not only as decoration, but also as a kind of informer.


Kitchen
It can be quite difficult to place a world map on a kitchen wall: usually the entire space is occupied by wall cabinets and household appliances. In this case, you can use a small map in the form of a poster, or apply a drawing of a geographical map to roller blinds.


Another option is to order an apron for your work area with maps on it.


Children's
The most “correct” map of the world in the interior of a children’s room is a classic geographical one, which gives an idea of the real picture of the world. After all, for a child this is, in fact, not just a design element, but a real geography textbook. However, it could also be a map depicting the world of his favorite children's books.


Bedroom
When decorating a bedroom, the map is usually placed on the wall adjacent to the headboard.


Cabinet
Traditionally, the best choice is to place a world map in the interior of the office. If a separate room for an office is not allocated, then the map will help to visually highlight the work area in the living room or bedroom. Here they can be hung on the wall in frames, or mounted on sheets of plywood and hung above the desktop.


Bathroom
The bathroom, decorated in a marine style, will be successfully complemented by maps of great geographical discoveries. Cards can be used both in decoration (wallpaper or tiles) and as decorative elements (bath curtains or posters).


Interior designers often use a technique such as depicting a world map on the wall. This looks appropriate in the offices of international companies, travel agencies and in teenagers' rooms. You too can make a similar map without much expense or effort. How exactly, see below in the step-by-step master class.
Materials
To make a world map with your own hands on the wall you will need to prepare
:
- cork sheet 100 x 60 cm, 5 mm;
- plywood sheet 100 x 60 cm, 3 mm;
- Printer;
- A4 sheets;
- scotch;
- spray adhesive;
- wood cutting tool;
- silicone glue;
- sharp stationery knife.
Step 1. You need to glue a sheet of plywood and balsa wood together and leave it under the press until the adhesive material dries completely.
Step 2. Find a world map picture that suits you. It should be contour. Scale it to the parameters you need and print it on A4 sheets.

Step 3. Place the sheets on a flat, level surface. Carefully fasten them together with tape so that there are no distortions along the contours.


Step 4. Cut out the island continents with a sharp utility knife.

Step 5. Place the cut out continents and islands on the base sheet from the plywood side, and trace with a pencil or a washable outline marker, marking the rough contours of the parts. This is necessary to arrange the parts while saving material as much as possible. Don't forget to turn the pieces mirror image. The front of the card will be a cork.

Spray the paper continents and islands with PVA spray glue and reattach them. Be sure to smooth out the paper if any creases form on it.

Step 6. Cut out the continents. To do this, you can use either a manual woodworking tool or an electric one.

Step 7. To correctly position the continents on the wall, attach to it the previously glued sheets of paper remaining after the fourth step.

Step 8. Remove the paper from the back of the continents.

Step 9. Apply beads of silicone glue to parts of the card.
There is a traveler in the soul of each of us. And even though not everyone manages to travel around the world, we still dream about it and, whenever possible, we visit other countries. Geographic maps in the interior can be viewed endlessly. World maps not only give aesthetic pleasure from contemplation, but also create a light atmosphere of romance and adventure, evoking pleasant thoughts about distant countries and memories of your trips. We invite you to see how you can use world maps in the interior of your home.
1. Geographic maps in the interior as wallpaper
A geographical map on the wall will become the central decorative element of the room's interior. Today we will not consider the standard option of placing a small world map on the wall in a frame or simply pinned with buttons. But if you have a large geographical map, you can completely cover the wall with it. In addition, now you can purchase or order photo wallpaper with the image of your choice or vinyl decorative wall stickers. Maps in the interior can be modern, ancient navigational or abstract stylized. This could be a map of the world, parts of the world, a country, a city, or a metro map. Most often, the walls of the bedroom are decorated with the image of a world map, but you can decorate the walls in this way in any room - the bathroom, children's room, living room or kitchen. You can use different themed children's wall stickers.


A very interesting option for a children's room. Climbing holds are fixed on the wall with a geographical map, and soft mats are underneath them.


Pay attention to the map - it is made in a fantasy style and is also “upside down”. Instead of continents there are oceans, and in place of water spaces there are kingdoms.

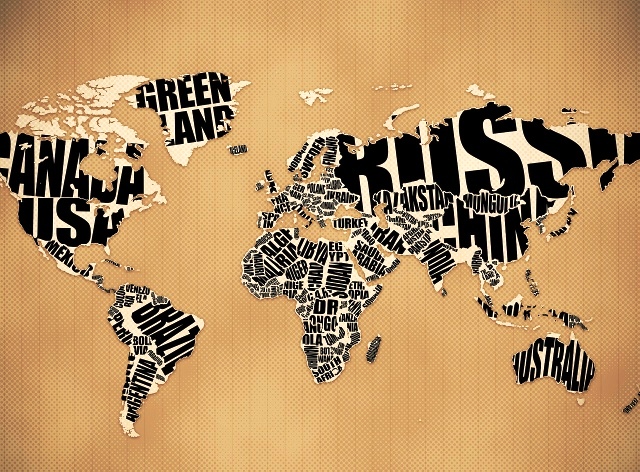
For interiors with modern modern and high-tech styles, stylized images of continents in the form of dots, lines, letters and other artistic techniques are suitable.


2. Geographic maps in the interior in the design of the floor and ceiling
While decorating walls with geographic maps is quite common, it is rare to see such decorations on the floor or ceiling. Nevertheless, this is also an interesting and original option. Don't turn the entire room into a world map. If you decide to decorate the floor with maps, you don’t need to decorate both the walls and the ceiling with them; it’s enough to support the overall theme with small framed world maps on the wall or in accessories.


Although here is an interesting solution, when photo wallpaper depicting a geographical map smoothly goes onto the ceiling. But in this case, in order not to overdo it, there are no more items with cards in the room.

3. Decorate doors and windows with world maps
Geographic maps in the interior can be present as curtains or roller blinds on the windows. They can be made either with your own hands or ordered from manufacturers.


4. Furniture with maps
World maps can be used to decorate various furniture. Geographic maps cease to be just maps, turning into decorative coverings for cabinets, chests of drawers and other pieces of furniture. As a rule, a paper map is glued to furniture using the decoupage technique. And it looks much more interesting than just hanging a map on the wall.

Any chest of drawers decorated with cards will be unique. You can either completely cover the entire surface of the chest of drawers or decorate only the drawers. 


You can decorate cabinet doors in the same way.

And in this chair and table there is decoupage in its purest form. Geographic maps cover all furniture parts, from legs to crossbars on the back.


5. Lamps with geographic maps
Maps of the world, illuminated from the inside by a lamp, acquire three-dimensionality and look very unusual. But it’s better to glue geographical maps onto factory lampshades and lampshades for safety reasons, and even cover everything with a fire-retardant compound for fabric or wood.


6. Geographic maps in the design of interior items
Many small items and accessories will support the geographic theme of the interior. Pictures and photo frames, boxes and stands, clocks and dishes - you can cover all this with cards or make decoupage. Nowadays, with the active use of GPS navigators, paper road maps have become practically unnecessary. Therefore, you can easily collect different cards from friends and acquaintances and make a lot of cute and useful things for your interior from them.


Long gone are the days when it was enough to indicate your address and phone number on the contact page. Today, any company that values its customers must place a location map next to the address. This is very convenient, including from a UX point of view. You can create a simple travel map using the Yandex.Maps or Google Map constructor. But sometimes you need something more complex - for example, a map may be needed for a presentation or to create infographics. In this case, you can use special online tools to create custom maps. Some of these tools allow you to create interactive maps that can present information in a user-friendly way. FreelanceToday brings you 10 free map making tools.
The Animaps service expands the functionality of Google Maps, allowing you to create maps with animated markers. Markers move around the map, showing, for example, the route of movement. A very useful service for creating interactive infographics. Using Animaps, you can create a whole story about an event, accompanying it with text blocks and illustrations.
Easy to use, Scribble Maps has a variety of tools to create almost any kind of map. You can make a regular route map, but at the same time, the service can be useful for designers who would like to create colorful infographics. Scribble Maps allows you to add text, images, draw and color various geometric shapes, place markers, and much more. If you need infographics based on a map, you can’t think of a better tool. The finished map can be posted on a website, on a blog, or sent to a client by saving it in PDF format.
The creators of the MapTiler service made sure that user-created maps are displayed on any device. MapTiler is one of the most convenient applications for preparing tiles using the Google Maps API. Unfortunately, the free version of the program has very limited functionality, with which you can create only the simplest maps.
HeatmapTool is the best online tool for creating highly accurate heat maps. With this map you can quickly visualize data using different colors. The service allows you to control the radius, scaling and opacity of heat spots. Information can be updated in real time. Why was this service created? Primarily for visual display of any statistical data in a pre-selected region. You can make quite complex maps, for example, using the service you can show cellular network coverage, population density in the country and much more. The service is very powerful; it can be used to quickly process even very large volumes of statistical data.
After purchasing Nokia, Microsoft significantly improved its mapping service Bing Maps. Nokia maps have always been highly detailed and have good coverage, so you don't have to worry about accuracy. The functionality of the service cannot boast of variety, but there are quite enough tracks, markers and geometric shapes to create a fairly informative map. It is also possible to add images and text comments. After finishing the work, you need to save the result, after which Bing Maps will generate a link and code for embedding the map on the site.
The friendly user interface of the Click2Map service will help you quickly and easily create interactive maps of any level of complexity. The powerful functionality of the service will allow you to create professional maps in the shortest possible time. Using a large set of icons, you can personalize the map if you need to talk about a specific area of activity. Thematic markers will allow users to easily navigate the map. Markers can also be used to determine the location of a specific point. The marker supports various types of content - text, images, HTML code. To gain access to all the features of the service, you will have to sign up for a paid subscription, but if you register a free account, you can create maps with a limited number of markers, a maximum of 10.
The ZeeMaps mapping service makes it easy to create, publish and share interactive maps. The service is based on Google Map and with its help you can create even a very complex map with a large amount of data. Statistics can be imported from Excel, Access, MS Outlook and other programs. There are no restrictions on the number of markers; information can be changed at any time according to the user's wishes. You can add pictures, text, audio files, and videos from YouTube to markers.
The UMapper application allows you to create embedded flash maps. UMapper's visual editor is intuitive and allows you to add markers, draw shapes, and add interactive elements to your map. The service takes cartographic data from Microsoft Virtual Earth, Google, Yahoo, OpenStreet, which makes it truly universal. You can even make money using the application - if the created card receives 50 thousand views in a month, the service will transfer $12.50 to the user’s account. Disadvantages of UMapper include the watermark that appears on the map when using the free version and the display of built-in advertisements on the map.
GmapGis is a simple online application for drawing on Google maps. You can place markers, measure the distance between two points on the map, draw lines and geometric shapes. All functionality is presented at the top of the page, so there will be no problems using the service - everything is very clear. The result can be saved as a file or as a link. While using GmapGIS, a problem may occur - the user cannot draw a line or draw a figure. In this case, the developers recommend closing and opening the browser again. After this, you will have full access to all functionality.
Let's figure it out how to make a cork map of the world. We all periodically turn to the world map, especially those who travel frequently. However, a paper map does not look as stylish in the interior of a room as a cork map. A large cork map of the world looks great on the wall, turning geography into a work of art, and allows you to attach photos of places you've already visited or flags of your planned trips.
First, print out a world map (or buy a ready-made one). But it’s better to print the individual parts of the card on A4 sheets, and then connect them with tape. Then, using a knife, cut out the continents and islands (photo below). Yes, this is painstaking work, but the more details (islands) you can prepare, the better the map will look in the end.

How to make a cork map of the world (photo 1)
Distribute the resulting paper parts of the world map on a canvas made of plywood-cork material (if there is no ready-made such material, then glue the cork cloth to the plywood at the rate of: approximately 2/3 of the thickness - cork, 1/3 - plywood), applying them to the plywood side of the canvas . Trace the outlines of the paper parts with a pencil or marker. Then, using a jigsaw (regular or electric), cut out the details of the future map:

How to make a cork map of the world (photo 2)
Finally, tape the map template (leftover paper layout) to the wall (such as ) and use it as a guide to install the cork pieces of the map. Attach the card parts with the “plywood” side to the wall using glue. When all the parts are installed, remove the paper template and... that's it, yours cork map of the world ready!


