Find the relevant code snippet. You can see the wishlist code in the screenshot below (highlighted in grey). Remove the code as well as the tag

Let's change the menu item names Registration(Registration) and Basket(Shopping cart). Unzip the template package, go to the folder themeXXX. Unzip the file with extensions. Open TemplateMonster_header .ocmod .xml in the editor.

Check if the file contains the header you want to change. You can use the search function in the editor to find relevant text. The name “Registration” is indicated in the modification. Changes must be made directly to the modifications. Alternatively, you can make changes to the file (en-gb is the language folder).
We have changed the name Registration(Registration) on Test Registration(RegistrationTest). Save the changes you made to the modification. The same changes need to be made in other languages.

Go to the tab Extensions -> Modifications(Extensions -> Modifications). Find a modification TemplateMonster header and select it. Remove modification.

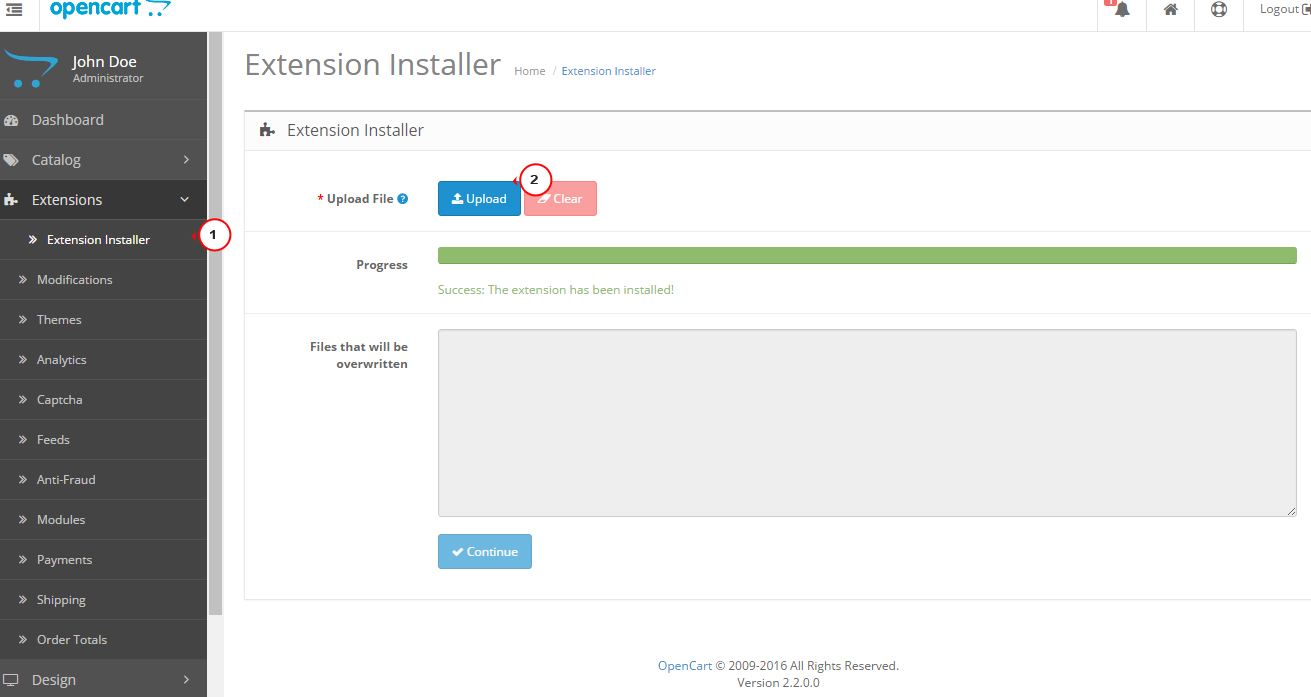
Go to Extension Installer(Extension Installer). Download the modification with the updated header.
Update modifications(Refresh modifications) in section Extensions -> Modifications(Extensions -> Modification).
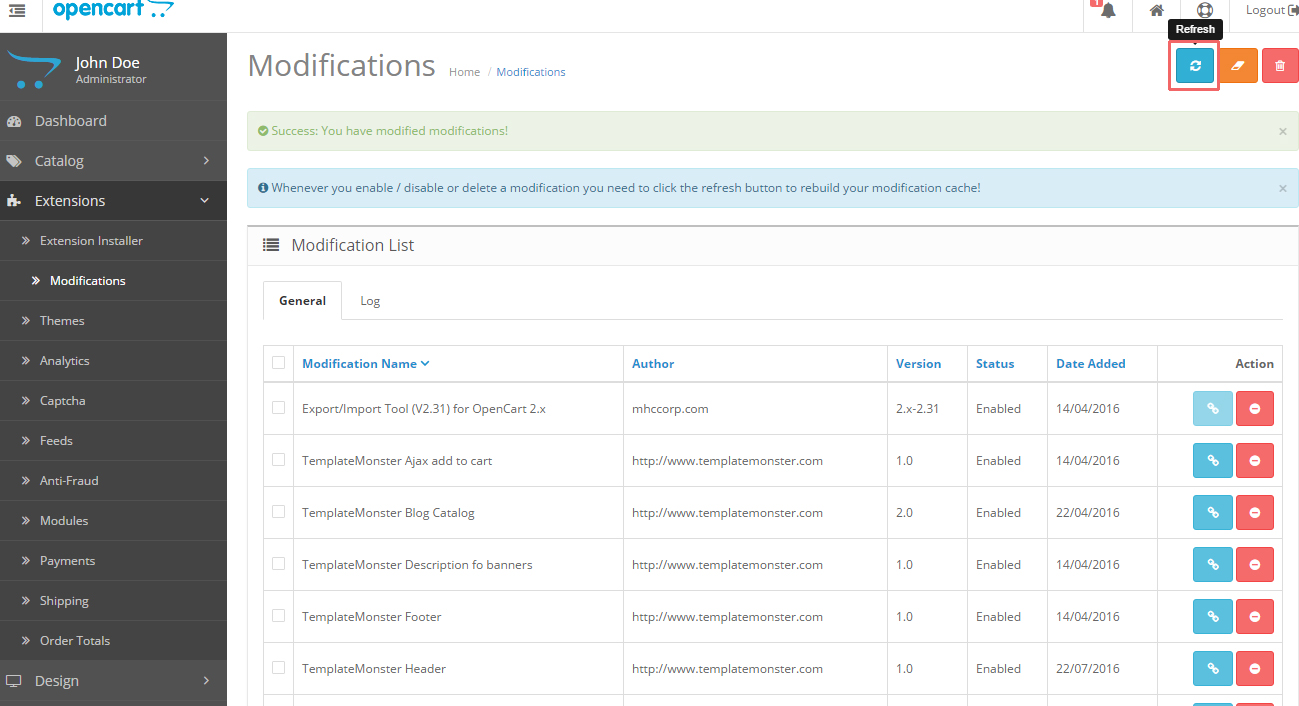
Refresh the page. We have successfully changed the name for the menu item Registration(Registration).

In our case the text Basket(Shopping cart) can be changed directly in the language file. Open the file \catalog\language\en-gb\common\header.php(the file path depends on the language) in your editor. Change the text. Save your changes and upload the modified file.

Go to the tab Extensions -> Modifications(Extensions -> Modifications) and update the modifications. Refresh the page.
We have changed the name Basket(Shopping Cart).

Let's remove the menu item A wish list(Wish List). Open the file \catalog\view\theme\themeXXX\template\common\header .tpl in your editor. Find code with a structure similar to this:

You can also check out the detailed video tutorial below.
allows you to create a multi-level horizontal or vertical menu for OpenCart 3 and display these menus at any position on the site.
To display a horizontal menu, the module adds a new position to diagrams/layouts, so you can create different horizontal menus for different schemes site. If a position in the diagram is not filled, the default is displayed horizontal menu Opencart3.
For withdrawal vertical menu standard opencart-3 positions are used (left column, right column).
Features and capabilities of the “Uni Mega Menu” module:
- Creates multi-level menus
- Displays categories, subcategories,
- Displays arbitrary products
- Displays a list of products (new, popular, discounted products, bestsellers)
- Displays manufacturers
- Displays images
- Custom links
- HTML content
- Drag&Drop menu editor
- Ability to add icons to menu items
The module does not overwrite site files; if necessary, simply disable the OCMOD modifier and your store will return to its original form.
Installing the Uni Megamenu module
Attention! To install the module correctly, you must have a free add-on installed.
- Go to Modules/Extensions → Install extensions and download the uni-megamenu-oc3.ocmod.zip file through the installer.
- Go to the Modules/Extensions → Modifiers section and click the Update button.
- Go to System → Users → User Groups and in the Administrators group add rights to modify the module.
- Go to Modules/Extensions → Modules/Extensions, install the Uni Megamenu module.
- Create a new menu or edit the demo menu that appeared after installation.
- Go to Design → Layouts and add the module to all or selected layouts.
- Update
What to do if the module does not work?
1. Check that the module is installed correctly according to the instructions.
2. Go to Settings -> Users -> User Groups -> Administrators and add administrator rights to manage the module (in the top two lists, click “Select All” and save the settings in the upper right corner.
3. Clear all theme, modifier and template caches. To quickly clear all caches, we recommend installing this module.
4. Check the error log of OCMOD modifiers. If you are using a template with a structure different from default, then perhaps the modifier in some place is not connected to your template. To check and fix errors in OCMOD modifications, we recommend using this module.
5. If you couldn’t solve the problem yourself, write to us in tech. support, we will definitely help you.
Important! When contacting technical support (to save your and our time) immediately provide access to the admin panel of your store. In some cases, you will also need access to your server via FTP.
From the author: Greetings, friends. So, we continue the series of articles devoted to getting to know one of the most popular CMS for creating online stores - OpenCart. In this article we will talk about how to make a side menu in OpenCart.
This article will be very simple and is intended for beginners who are just beginning their acquaintance with CMS OpenCart. For those newcomers who seem to be wondering a simple question: how to make a side menu in OpenCart? The thing is that by default on home page The Opencart online store does not have a side menu of categories.

However, displaying it is quite simple; the already existing category module will help with this. Let's use it. Go to the admin panel in the Add-ons – Add-ons menu and find the Categories module in the list of modules.

Go to its settings and make sure that this module is enabled, i.e. ready to use. If suddenly it turns out to be turned off, then turn it on and save the changes.

Next, go to the Design – Schemes menu and among the layouts, select the main page layout and proceed to edit it. For the left column, from the list of available modules, select the Categories module that interests us and save the changes.

It remains to check the changes on the main page of the site; a side menu of store categories should appear there.

Very simple, isn't it? By the way, if you are not satisfied appearance side menu module, then you can change its layout in the active theme file, by default it is \catalog\view\theme\default\template\extension\module\category.tpl. Well, you can change the design, respectively, through the style file. But that is another topic.
When developing an online store, I was faced with the need to create a third level of category nesting, since the basic two were not enough. Attempts to find free modules for opencart 2.0.3.1 for a three-level menu, written without using the outdated VQMOD, were unsuccessful.
Fortunately, two free modules were found for this version of the CMS on VQMOD, which I rewrote for myself.
So, the following modules were taken as a basis:
- Menu third level submenu - for a three-level drop-down main menu
- Categories menu 3rd level submenu - to display the third level of menu within categories
To install the modules, just download 2 archives at the end of the article and put them in the appropriate folders. There are no unnecessary links to me or the developer, you can safely upload them.
In addition to the fact that it began to work on OCMOD, several changes were made to the original module:

After all the edits, the module now looks like this:

Installation instructions
Installation is simple. For the standard template (default), just unpack the archives and upload the files to required folders. After the files are uploaded, be sure to go to the administrative panel -> modules -> modifiers and click the “Update” button in the upper right corner.
If you have a different template name, you will need to make changes to the menu3rdlevel.ocmod.xml and CategoriesMenu3rdLevel.ocmod.xml files. In all file paths you will need to replace "default" with the name of your template. Also, do not forget to click the “Update” button in the modifiers.
Archives with modules
Menu3rdlevel-opencart - three-level main menu for opencart 2.0.3.1 v1.2
CategoriesMenu3rdLevel - three-level menu for opencart 2.0.3.1 in viewing categories
Version changes
Version 1.1. Fixed a bug with the menu item "See all products" not disappearing.
Version 1.2. Fixed a bug with moving cards to the next line in displaying products in a grid.
Paid installation
If something doesn’t work out for someone, a paid installation costing only 300 rubles is possible.
Support the author
If you have used this module and are sincerely grateful, you can support the author by transferring any amount through the form below or reposting the article using the buttons social networks in the footer of the page.
Error 500 after installing the module means that something happened critical error in php.
To identify the problem you can:
1. Open the logs/error.log file on your server. At the end of this file there will be all the latest critical errors.
2. Open Tools > Error Logs in the admin panel - errors are displayed here, but not always.
3. Enable output php errors to the screen - add the following code to the end of the .htaccess file:
Php_value display_errors 1
php_value display_startup_errors 1
php_value error_reporting E_ALL
Possible reasons:
1. If you have not downloaded modules in the archive through the admin panel before -you need to install free modification according to the instructions and then reinstall the module
2. Perhaps the installed module is missing own page settings and accordingly it will not be in the list of Modules
Two solutions:
1. If this error occurs when installing the module from the admin panel, you need to install the free one. It will install without problems through the same add-on installer, just after installation, do not forget to update the modifications and then you can start installing any modules on Opencart 2.
2. You can also solve this error in another way: register access to FTP in the admin System > Settings > Store > FTP tab.
If you see the message " Access is denied! You do not have permission to access this page. If you need it, contact your administrator." - you need to give administrators rights to manage the module or page.
Solution: in the Opencart 2 admin panel go to System > Users > User Groups > Administrators and here we click “Select all” below both blocks, then Save.
Another reason for this error to appear may be correct installation module - the files were not loaded into place. Upload the module files manually to the server or install the fix and reinstall the module.
If the module is one XML file, then its extension should be .ocmod.xml
If the module is an ocmod.zip archive, then you do not need to unpack it, but install it as is. Such an archive must have an upload folder (can be empty), and there may also be modification files: install.xml, install.php, install.sql. There should not be any other files in the root of the archive.
This error means that you are trying to install a modifier that is already installed or perhaps one of your modules has the same ID.
To solve this error, you need to remove before installing old version modifications in the Modules > Modifications section.
If you don’t have such a module, but the ID is the same, then you need to change the value of the parameter in the installed XML modifier, make this parameter unique by adding several characters.
This error means that you are trying to install too volumetric xml modifier.
The number of characters in the ocmod.xml file should not exceed 65535 .
To solve the error, you need to split the modification xml file into several parts, the main thing is not to forget to set each unique value in , you can add the numbers 1,2,3... to the current value as part identifiers.
Another solution is to change the type in the fields where modifications are stored in the “oc_modification” table of the database. You need to run the following SQL query:
ALTER TABLE oc_modification CHANGE xml xml MEDIUMTEXT CHARACTER SET utf8 COLLATE utf8_general_ci NOT NULL ;


