Let's figure out whether it is possible to upgrade the MacBook Air at home by increasing its memory.
It is not difficult. But there are several very important points that you need to know. Otherwise you will lose money.
Which MacBook Air models can replace the SSD drive?
IN MacBook Air before 2010 you can replace the drive with a 1.8-inch SSD with a SATA interface. We won’t talk about them today, since the computers are outdated, and the SSD drives themselves of this form factor are publicly available and do not differ in any features critical for the Mac. Just bought it and installed it.
IN MacBook Air models from 2010 year, you can also replace the SSD drive. But there is a rare form of it, hence the need for this article.
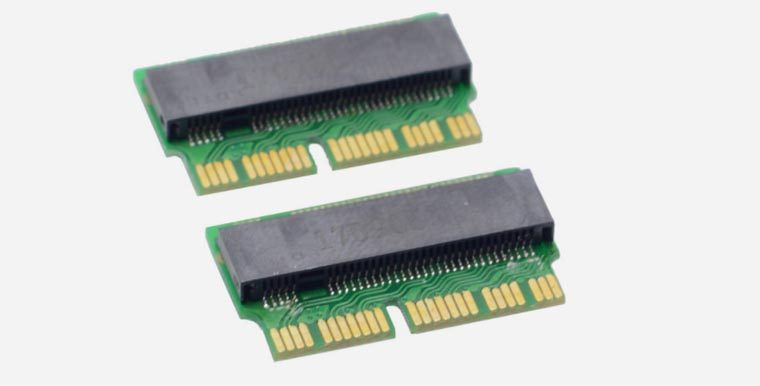
Apple in its repertoire. SSD drives in all modern MacBook Airs have a rather specific connector 28pin. Thank you for at least not unsoldering the drive on the motherboard.
Posted by site (@site) Dec 6, 2017 at 11:53 PST
Because of this, replacing an SSD becomes very difficult, leaving the following options:
1. Buy an original SSD drive for your MacBook. You will have to look for such components, and the price for them is frankly not encouraging.
2. Find a similar third-party SSD. Again, it all comes down to price, as they say, the game is not worth the candle.
3. Use a special adapter. A small adapter for $13 on Amazon or $9.5 from AliExpress allows you to install almost any modern M.2 drive instead of a standard one.
A suitable 256 GB SSD will cost 7-10 thousand rubles. For 15-17 thousand rubles. (the difference between MacBook Air models) you can find a 512 GB model.
After the upgrade, you will still have a 128 GB stock drive that can be sold.
Important: it’s not enough to just buy a “flat” SSD
Not every SSD drive is suitable for use with an adapter.
Firstly, The SSD must support the Serial ATA interface and the AHCI (Advanced Host Controller Interface) mechanism. This is usually indicated in the device specifications.Secondly, the drive must have a connection key M or universal B&M, but not key B.
Third, the length of the SSD board should not exceed 80mm, otherwise it will not fit. If the drive is too short or an adapter board is used, you will most likely not be able to get into the mounting hole and will have to use double-sided tape to secure the drive.
How to replace SSD on MacBook Air
Attention! Replacing computer components yourself will void the warranty. You carry out all actions at your own peril and risk.
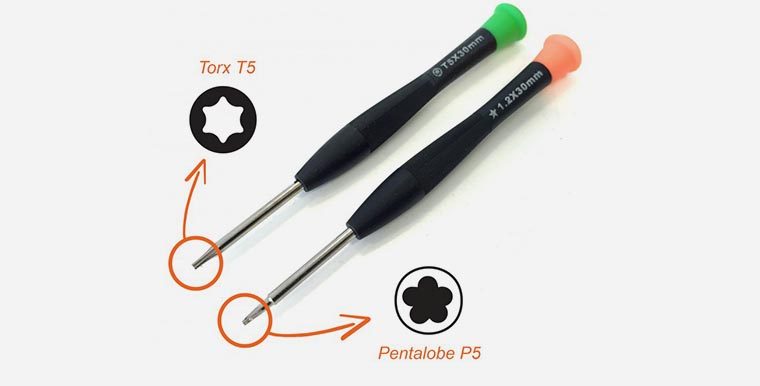
To replace you will need a pair of screwdrivers: T5 Torx And P5 Pentalobe.
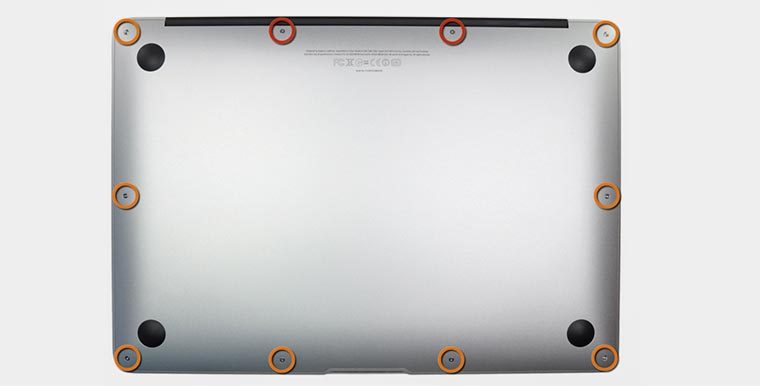
1. Using P5 Pentalobe, unscrew the 10 screws on the back cover of the laptop.
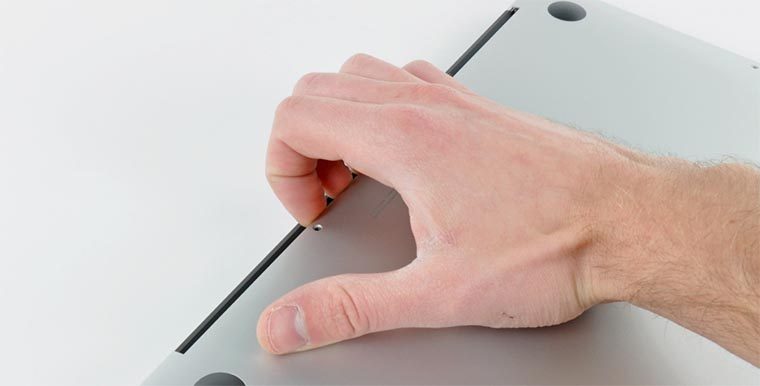
2. Carefully lift the cover near the display hinge.
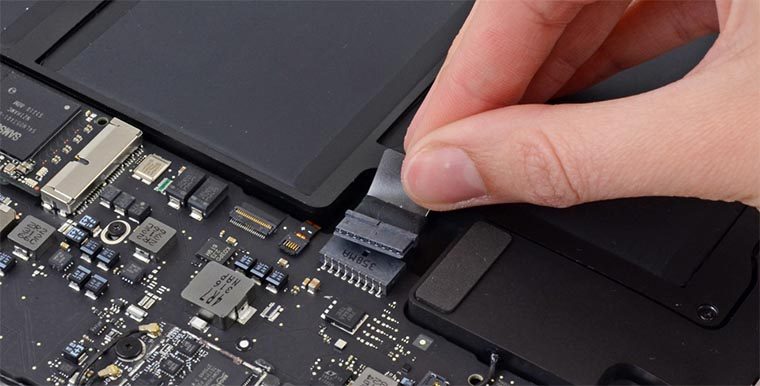
3. To disconnect the laptop and prevent accidental startup, it is recommended to disconnect the battery. To do this, you need to find the power connector and pull the plastic tab.
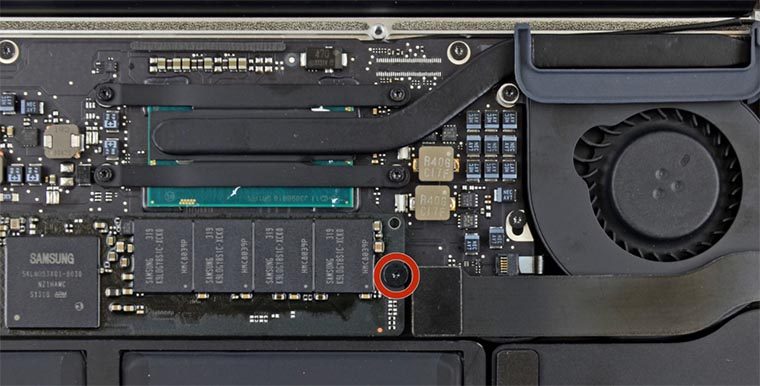
4. Using a T9 Torx screwdriver, remove the screw securing the SSD drive.
5. Install a new drive and repeat the operations in reverse order.
That's not all, you need to configure macOS
After replacing the disk, you can perform a clean installation of macOS or roll a backup copy. In any case, after starting the system, you will need to perform another operation.
When using a third-party SSD with macOS, you must enable the TRIM command. Otherwise, over time, the drive's performance will drop and write operations will be slower.
Since version OS X 10.11 El Capitan You can activate TRIM on all SSDs using the terminal command: