The situation in which you run out of space on your hard drive is quite typical. The thing is that the main place is occupied by the folder, which is located in appdata/local.temp and its volume is constantly increasing.
Not only beginners, but also experienced users do not always quickly find a solution to this problem. Let's try to figure out what this folder is responsible for and whether it is possible to delete it.
Temp folder - what is it for?
This folder has important in system. Its essence is to store temporary files. The whole point is that system applications are not always able to completely uninstall certain applications, so clearing temp is necessary produce independently.
Inexperienced users are extremely surprised when HDD constantly full. And when they find this folder, they are surprised at how much it weighs. For some users, the folder can accumulate for many years, so it accounts for a significant part of the busy part of everything hard drive.
The temp folder cannot be deleted - it can only be cleaned regularly. Automatic cleaning of this folder also exists. There are a number third party applications, which in specified time They will clean themselves without your help.
Options for cleaning the temp folder in Windows 7 and 8
There are several of them. Choose the one you like.
Standard cleaning method
Let's look at the most common method. But to understand how to clean it, you need to understand how to find it. You can do this in the following way:
- First you need to do hidden folders visible;
- After this, you need to find the folder with temporary files (path to folder: Users\Your Account Name\AppData\Local\Temp);

Only after this can you proceed to the most affordable cleaning option.
- After you have entered this folder, you should delete all elements from it. You can select all files or delete them all at once. But, unfortunately, this procedure almost never works the first time. The reason for this may be various factors. For example, the running application can directly affect the ability to delete a particular file. Therefore, for the procedure to go smoothly, you should close all applications and try to uninstall.
- If turning off all windows does not help, you should restart the device and then try the procedure again.
Cleaning using the system disk
If this method is not suitable for some reason, then you can use another method. This method is as simple as the traditional one, so absolutely anyone can use it.
- You should open the disk with the system right click mice.
- In properties you need to click on disk cleanup. This system utility helps to delete not only temporary files accumulated by the system, but also, for example, the “Windows.old” folder. This folder appears when the system is updated, and it is extremely difficult to get rid of it, but this is the topic of a separate article.
- After clicking the button, select the files that need to be deleted and select cleaning. This procedure does not take much time, and also does not cause errors during removal. Cleaning occurs quickly and irrevocably.
Completely deleting files from a folder via the command line
This solution is extremely convenient and practically time-consuming. The steps are as follows:
- You should launch a Command Prompt with administrator rights, and then enter the following command:
DEL /F /S /Q /A “c:\windows\temp\*”
- You must confirm the procedure with the Enter key and wait for it to complete.
- After the procedure is completed, the folder will be completely cleared.
It is not very convenient to constantly perform this action using the command line, so many people prefer to use a variety of cleaning programs.
Read also:
Programs that can be used to clean
There are many various programs, which can solve the problem with cleaning the temp folder. They are divided into paid and free, and also carry various functionality.
For example, CCleaner. This program has proven itself to be excellent among most users and has the widest range of functions.

Removal via this program extremely simple. You should go to the “cleaning” menu, and then select the items shown in the screenshot and confirm your choice.
The program has one drawback. The software only works with Windows XP and version 7 systems. Possible compatibility with version 8 of the operating system. But it doesn't work with 10.
Cleaning the temp folder in Windows 10
This procedure on Win 10 is not much more complicated than in previous versions. To clean, you should:
- Go to the “Options” menu;
- Then "System";
- Then select the “Storage” tab and the system disk;
- Check the box with temporary files and clean the system.

Windows 10 also has the option of automatic cleaning. To do this, check the “delete temporary files” option in this folder and enable the memory control function.
In this version of the operating system, it is possible to delete temporary files in a folder using the standard method. To do this, you need to find this folder. You can do this manually, or use the search function. IN search bar you need to enter %temp, and this folder will immediately appear in Explorer. But, before that, you need to make all hidden folders visible.
Once you have entered this folder, you should clean it up. The easiest way to do this is by selecting all the files and deleting them while holding down Shift key. This solution will eliminate the need for subsequent emptying of the trash can. All files will be immediately deleted irrevocably. You can select all files using the combination Shift+A.
Read also:
Bottom line
If you noticed that temp folder quickly fills up and there is constantly not enough space on the computer, then with the help of our tips, cleaning it will not be difficult.
Everyone chooses the most convenient way removal, however, experts recommend using automatic cleaning tools so as not to constantly remember the need to perform this procedure.
If the Temp folder weighs a lot and needs cleaning, then knowing the methods, deleting all the files inside it will not be difficult.
To complete the picture, watch this video:
If you are not a beginner computer user, you probably heard or came across the WinSxS folder. She could not help but raise questions, because... takes up quite a lot of space. And since every megabyte on drive C matters, I think you have a desire to reduce the size of this folder.
Unfortunately, the folder not only takes up a lot of space, but also grows all the time. Various unnecessary files accumulate in it, and the longer you work on one operating system, the more WinSxS “weighs”. Well, if you are very concerned about the windows folder taking up a lot of windows seats 7, I’ll tell you how to reduce it a little.
Why do you need WinSxS?
The WinSxS folder is a service folder; it is necessary to store versions of OS system components installed previously. In other words, thanks to the contents of this folder, the user can roll back to previous version operating systems if necessary.
When old files are replaced by new ones, however, this rule does not work in relation to WinSxS: even old versions are stored in it. Since the replacement process does not occur, it is constantly growing.
How to empty the WinSxS folder
The Internet offers different ways clean this service folder, but almost all of them lead to errors and malfunctions in the OS. On this moment There is only one option with which you can partially clear the folder, and its essence is as follows:
Of course, after completing all the steps, the WinSxS folder will remain in its place. It will become smaller, because all old versions of files will be deleted, only the penultimate ones will remain. Hence the conclusion is that if you recently installed the OS, then there may be nothing to delete in the folder. And vice versa, if Windows 7 has been on the computer for a long time, then the folder will “lose weight” by a couple of gigabytes.
In general, try it, and remember that the method described above is the only one that will not lead to the operating system losing its functionality! Therefore, you should not take risks and use other untested methods; you are unlikely to get a positive outcome from them.
Many owners Windows Vista and 7 have probably encountered the fact that the Windows folder grows by leaps and bounds over time. I put up with this until the 40 GB partition with the system began periodically giving me messages that it was running out of free space.
I found one wonderful tool whose magic allows you to reduce the size of the winsxs folder without losing performance/stability/data. First, I did everything described under the cut on my home beech, and now, for the purity of the experiment, I will repeat it on my work one.
0. A little theory
In general, a lot has been said about how Windows uses system disk space, so I will be brief here.pagefile.sys- swap file. You can disable it if the RAM size is large, or you can adjust the size manually.
hiberfil.sys- the file in which the snapshot is saved random access memory when the computer goes to sleep. In the “Disk Cleanup” menu, among other things, there is a “Clean up hibernation files” option. If you do not use this mode, you can clean it. If you regularly “fall asleep” your computer/laptop, then after clearing this file, you will have to use this advice, or simply enter command line powercfg -h on && shutdown -r .
Users' personal folders (My Documents, Desktop, Appdata, Main Menu, etc.) can be painlessly transferred to another location via properties required folders, and via regedit or group policies. This is a separate conversation, I will not consider it here.
It should be noted that any updates and upgrades in Windows system are reversible, that is, by installing Vista Service Pack 2 (6.0.6002), you can roll back to 6.0.6001, and then to the original build. In order to make all updates installed on the system irreversible, you need to use two system utilities:
vsp1cln.exe- sweeps up debris after installing Vista SP1.
compcln.exe- does the same for SP2.
The system creates restore points on demand and automatically when installing drivers, important updates, on a schedule or on demand. Recovery uses up to 15% of the space on each drive it is on. You can disable it, or you can use “Disk Cleanup” on the “Advanced” tab to leave only the last restore point to save space.
About the folder winsxs the developers wrote that this is the main storage of the OS, and all the rest system files- this is a type of hardlink, blah blah blah..., and yes, accept it as God’s gift that over time the size of the folder will only increase.
1. Preparation
Windows Vista Business 32-bit.First I found out the size of the winsxs folder - about 4.5 gigs.
Next, all important and recommended updates as of October 8, 2009, including SP1 and SP2, were methodically installed. After completing all the procedures, I downloaded the wonderful Scanner to visually assess the scale of the disaster.
Installing updates has transformed Windows folder.
Now in order:
-vsp1cln.exe;
- compcln.exe - worked for about five minutes.
After that, I make a recovery checkpoint (you never know), get rid of the previous ones, and move on to the most important stage for today.
2. Winsxslite
It's not even a program - it's a .bat file that reduces the size of the winsxs folder. It was written by a certain Christian Bering Boegh and is distributed “as is”, which personally raised some suspicions in me, which could only be dispelled by a successfully executed script. You can find the link latest version script (1.86) with comments from the author.The script operation includes two phases:
1. Search in the Program Files and Windows files, identical to the files in winsxs.
2. Replacing old versions of a file in winsxs with hard links to newer versions of the file.
You can work with both the online system (that is, a running OS) and the OS image.
Working with the online system looks like this:
- Phase 1 scan;
- Phase 1 apply;
- Reboot;
- Phase 2 scan;
For the script to work, the configuration file config.txt is also used, which specifies exceptions for the first phase (logs, temp, cache, etc.), and language priorities for the second phase (unused localization files are replaced with hardlinks of the corresponding files of other languages), In the default config, “da-dk=KEEP” is written, which changes to the desired line ru-ru=KEEP, uk-ua=KEEP or other necessary one.
Winsxslite will only work if you have the following software:
- SubInACL v5.2.3790.1180;
- PendMoves v1.1 and MoveFile v1.0 ;
- - Command Line Hardlinks;
- Fcmp v1.6 - the author recommends using 1.6;
- MD5File ;
- StringConverter v1.2.
All installed files I put it in the winsxslite folder. If anyone is bored of doing all the procedures themselves, here is the link. There is actually winsxslite, all the necessary software plus a config with the corrected da-dk. The config can be deleted. When you launch winsxslite for the first time, a default config and help file will be created.
3. Results
Looking at the results, I realized that I had made a strategic mistake - I took a laptop for the test that was hardly used at work. That is, the OS was only a couple of days old, and virtually no one was working on the laptop. On a home computer, the results were more noticeable. There, the winsxs folder lost 8 gigs, but to the same 14.8.
Be that as it may, both patients were not harmed, and winsxslite turned out to be an excellent help in reducing the volume of insatiable Windows.
In conclusion, I would like to note that both phases of the script can take from one to two hours of computer work.
P.S. about disk space usage in Win7. None third party programs systems (such as vLite) were not used for castration.
Hi all! Because the most popular operating system now windows, I decided to show on it how you can get your rightful one back, on system disk free place.
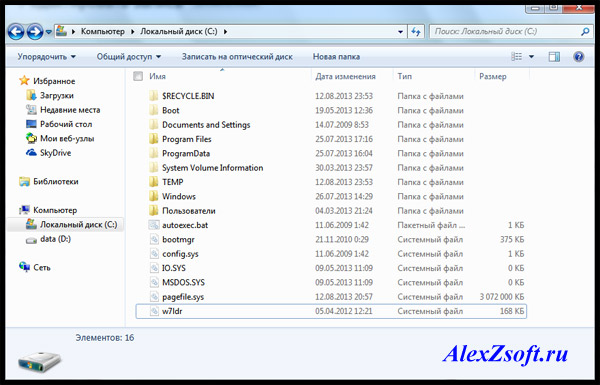
5. Let's see if you have them on your disk unnecessary files. At the very beginning of the disk it should look like this (be careful, in case you have a folder with the program):
6. If you have one user, it will be easier, if not, you will have to view all users. I'm almost lucky, I have my user and my mother's. And because Mom doesn’t do anything other than look at her classmates, so there’s no point in going into her folder)

Here, of course, the most important folder is downloads (you can move it in the properties). Everything goes there according to the standard. You can also find many files in other folders. Don't forget to also look at what's on your desktop! I have a lot of files because... I also have shown hidden files!
7. Now you can remove the swap file or move it to another drive. To do this, go to:
start - control panel - system - advanced system settings - advanced - performance - settings - advanced - virtual memory - change


We select without a swap file. And, to transfer to another drive, simply click on drive D, for example, and select the size of the paging file or the system's choice.
8. Delete identical files. Perhaps you have on . Duplicates are rarely needed, so we look for a suitable program to search for identical files and delete them.
9. You can look at saves from games, sometimes they weigh a lot.
10. Remove infected files from antivirus quarantine. If your antivirus has quarantined a significant file, you can delete it)
11. By the way, look what’s in your cart)
12. Delete help files and manuals if you do not use them in the folder:
13. Delete the entire program cache in the folder: C:\Windows\Prefetch (windows will create what is needed again) 14. Clear the folder: C:\Windows\SoftwareDistribution\Download 15. So, be careful with this guy! A folder can take up a lot; these are folders and installed software packages installed on your computer. After they are removed, you will not be able to add components or uninstall programs. But this is not for all programs. Here you do it at your own peril and risk, for example, after removal everything was fine for me.
16. Drivers are stored here, delete at your own peril and risk, I haven’t tried deleting, but they say you can only have to constantly push disks with drivers. This is the folder:
C:\Windows\System32\DriverStore
17. There is a lot of rubbish here, for example - there are old folders from remote programs:
C:\Users\your username\AppData
If you still don’t have enough disk space, then you need to use I didn’t remember more methods, if you know, write in the comments. And that's all I hope you got your free disk space back🙂 Now you can relax)


