This article will tell you how to get ROOT rights to Android using the Kingo ROOT program.
Navigation
Perhaps the most open, easily accessible and unprotected platform today is the Android operating system, since its capabilities, along with access to the depths of the system, are available to almost everyone who has at least a little knowledge of programming.
But being a programmer in order to get into the so-called depths is not prerequisite. After all, even at the time of development and subsequent updates of the platform itself, in the application Google Play we could see simplified programs for this that even the average user can handle.
Therefore, today we will touch upon the topic of entering the depths of the system through the Kingo ROOT program, and will also tell you how to get ROOT rights, and what advantages and disadvantages you get at the time when you already have them.
What are the advantages of ROOT access on the Android platform?
It is worth noting, that there are still more advantages here than disadvantages, because no one would use them. After all, who wants to get more minuses than pluses? Where is the logic?
But here everything is as it should be, so let's describe the very advantages if we take over the ROOT rights to Android platform:
- Administrator mode. After all, as you know, obtaining ROOT rights on the Android platform gives you the opportunity to delete the entire application, including system ones, which, by the way, cannot be deleted without root rights.
- No restrictions. If you have ROOT rights, you may notice that all applications and games are installed on your smartphone, some of which require special access and, in particular, ROOT rights.
- Advanced functionality. It is the expansion of capabilities, functionality and settings of their Android system that most attract many users of such devices, there is an excellent proverb for this "The forbidden fruit is always sweet".
- Performance improvement. Do not forget that when you obtain root rights, you also get access to settings special programs, which help improve the performance and optimization of the phone, along with increasing the performance and battery life of the smartphone.
- Advertising ban. Surely you have noticed that during the process, when you play a game with an Internet connection, advertising periodically appears on it, sometimes at the top, sometimes at the bottom, sometimes all over the screen, and in order to remove it, you need to buy paid content for this game, but Why do we need such conditions? After all, we can just get root rights, and that’s it advertising banners, windows, viruses will disappear in an instant!
What are the disadvantages of ROOT access on the Android platform?
In principle, these shortcomings appear in cases where the smartphone is under Android control is used by a beginner or inexperienced person, because if you are already a user who has the necessary knowledge and precautions when using an identical smartphone, then frankly, there are no disadvantages as such.
But still, let's talk about the disadvantages if a newcomer who just bought a smartphone running Android takes over root rights:
- Loss of warranty. It is worth emphasizing that root access was created exclusively for developers, or simply for people who repair and maintain such devices. But still remember that if you have received root rights on your smartphone that you just bought, then this is reversible in that you will lose the guarantee for free repairs and maintenance of your device at official technical services. Of course, loss of warranty can be prevented by simply removing root rights.
- Lack of stability in the operation of the device. You can often find many problems and questions on thematic forums for the repair and maintenance of smartphones running Android. The reason for this is that many users who decide to take root rights are newbies or simply do not understand the intricacies and basics of ownership in the depths of the Android system.
- End of smartphone support. This is exactly what can also be found in cases where you have received root rights on your Android device. After all, officially obtaining root rights is prohibited, since many who want to take possession of them are just beginners. Therefore, if you are one of them, then know that if you have rooted your smartphone, then you have simply deprived yourself of receiving subsequent software and firmware updates.
Well, now that you have become familiar with the main advantages and disadvantages of obtaining root rights, you can move on to the next stage.
How to get ROOT rights to Android using the Kingo ROOT program?
It is worth noting that the Kingo ROOT program is not the only one that is used to obtain root rights. After all, on the official Play service Market, you can find a huge number of similar programs that have the same capabilities as the Kingo ROOT application.
But since we are now talking about this application, let’s look step by step at how to get ROOT rights to Android through it.
So, to get ROOT rights on your smartphone, you need to follow our clear algorithm of actions:
- First of all, you need to download the Kingo ROOT program, and you can do this at official website.
- After the program has been downloaded, you need to install it; the installation process takes about two minutes.
- Now that the installation of the program is complete, you need to launch the Kingo ROOT program and at the same time connect your Android device to the PC using the USB interface.

- The program will automatically search for connected Android devices, you just need to wait until the request appears on your device "USB debugging", in which you just need to check the box next to the item "Always allow debugging from this computer", and then confirm your agreement.

- After this, an application will be installed on your smartphone that will allow you to get root rights on your device. When the installation process is completed, you may notice that Kingo ROOT on PC will display a button "ROOT", which you need to click on. By the way, do not forget to confirm your agreement when requesting installation "Custom Recovery".

- Now the process of obtaining ROOT rights has actually begun.

- After the process is finished, your Android device will reboot, and then you need to go into the Kingo ROOT program again, and see the message in the main program window "Root Succeed", which indicates the successful receipt of root rights, but this needs to be secured, for which you just press the button "Finish".

- Ready! You now have superuser rights!
Video: How to get Root rights to Android using King Root?
Data-lazy-type="image" data-src="http://androidkak.ru/wp-content/uploads/2015/08/Android-Root..jpg 500w, http://androidkak.ru/wp- content/uploads/2015/08/Android-Root-300x127.jpg 300w" sizes="(max-width: 500px) 100vw, 500px">
 If you opened this article, then you probably already have at least some idea of superuser rights. But in that rare case, if you are an ordinary Android user and opened the article out of idle interest, a small educational program.
Superuser rights, also known as root rights (from the English “root”, which means “root”), are the ability to record, change and delete information located in the system (or root) partition file system. This concept similar to administrator rights on Windows and used on UNIX-based operating systems (Linux, Android, Tizen, etc.)
Root rights can be obtained on almost all Android devices and we will definitely go through the most popular ways to get them, but first let's answer two very important questions: is what we are about to do now safe, and also whether it is worth it.
What are the consequences of obtaining root rights?
Data-lazy-type="image" data-src="http://androidkak.ru/wp-content/uploads/2015/08/vnimanie.jpg" alt=" please note" width="145" height="121" srcset="" data-srcset="http://androidkak.ru/wp-content/uploads/2015/08/vnimanie..jpg 300w" sizes="(max-width: 145px) 100vw, 145px">
!}
 First of all, answer the question - did you read the warranty agreement that came with your phone? If you’ve read it, then you know that obtaining root rights is a gray area and whether your warranty will remain with you at the end of the process depends only on the manufacturer’s policy.
Next, remember one thing - the superuser gives you full access. FULL. That is, if it suddenly occurs to you to delete important system files, no one will stop you. So keep a close eye on which programs are granting you these rights, and also consult with other, more experienced Android users before you do anything stupid.
What benefits can you get with root rights?
Data-lazy-type="image" data-src="http://androidkak.ru/wp-content/uploads/2015/08/android-vigody.jpg" alt="Benefits of obtaining rights" width="159" height="50" srcset="" data-srcset="http://androidkak.ru/wp-content/uploads/2015/08/android-vigody..jpg 300w" sizes="(max-width: 159px) 100vw, 159px">
!}
 The list of things you can do with root rights is simply huge. Just take a look at the most popular reasons for gaining root privileges!
IMPORTANT: The program that allows you to perform this action is indicated in parentheses.
- Removal preinstalled programs a la Facebook or Twitter from the system partition (Titanium Backup);
- Transferring application cache from an internal memory card to an external one (FolderMount);
- Transferring the application section to a memory card (Xposed App2SD);
- Global modification of the interface with the ability fine tuning(almost all Xposed modules);
- Disable advertising in all applications (Adaway);
- Hacking in-app purchases from PlayMarket (Freedom);
- Disabling license verification in non-hackable applications, as well as hacking them (Lucky Patcher).
Read also: How to use a smartphone or tablet on Android for a beginner
And that is not all! In fact, with root access to your phone, you can do almost anything with it. And if your fuse has not yet cooled down, let’s move on to the actual process of obtaining root rights.
Instructions
data-lazy-type="image" data-src="http://androidkak.ru/wp-content/uploads/2015/08/Android-s-root-pravami.jpg" alt="Rooted Android" width="165" height="91" srcset="" data-srcset="http://androidkak.ru/wp-content/uploads/2015/08/Android-s-root-pravami..jpg 300w" sizes="(max-width: 165px) 100vw, 165px">
!}
 Unfortunately, you cannot simply enable root access on Android - manufacturers have tried to protect their creations from the crooked hands of users and this is, in fact, correct - otherwise the number of calls to service centers would have increased significantly. But this does not mean that it is impossible to obtain root rights at all. Moreover, for most phones this procedure is extremely mundane and takes only a few minutes.
There are many ways to obtain root rights and, as in our other instructions, we will go from simple to complex.
1. From the device itself
Data-lazy-type="image" data-src="http://androidkak.ru/wp-content/uploads/2015/08/google-play-logo-274x300.png" alt="google play market"width="92" height="100" srcset="" data-srcset="http://androidkak.ru/wp-content/uploads/2015/08/google-play-logo-274x300..png 405w" sizes="(max-width: 92px) 100vw, 92px">
![]() Despite the fact that many manufacturers block access to their smartphones as much as possible, hackers from all over the world from time to time find loopholes that allow them to gain rights with just one tap on the screen. And other manufacturers simply trust their users and even publish algorithms for bypassing their protection. It is on this principle that various automatic recipients of root rights are based, the most famous of which is KingRoot.
Despite the fact that many manufacturers block access to their smartphones as much as possible, hackers from all over the world from time to time find loopholes that allow them to gain rights with just one tap on the screen. And other manufacturers simply trust their users and even publish algorithms for bypassing their protection. It is on this principle that various automatic recipients of root rights are based, the most famous of which is KingRoot.
Everything you need to get root rights on a device with using KingRoot– is to press one button. Among the disadvantages, KingRoot is not the most familiar to old users Android manager right Instead of the usual SuperSU, KingRoot uses own program, which, however, is not very different from SuperSU in terms of functionality.
In addition to KingRoot, the Framaroot program is popular, as well as numerous other applications for Android devices, for example, VRoot,
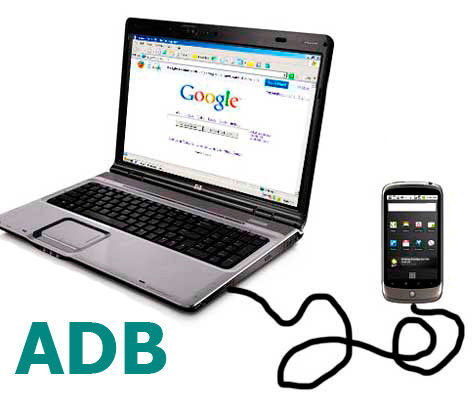
2. Using a PC and special programs
Data-lazy-type="image" data-src="http://androidkak.ru/wp-content/uploads/2015/08/android-i-pk-300x258.jpg" alt="Connection android to pc" width="150" height="129" srcset="" data-srcset="http://androidkak.ru/wp-content/uploads/2015/08/android-i-pk-300x258..jpg 473w" sizes="(max-width: 150px) 100vw, 150px">
!}
 If it is impossible to transmit instructions for unlocking from inside the Android system, this does not mean that this cannot be done at all. At least, programs such as SuperOneClick, Kingo and many others operate according to this principle. As the basis of their work, they use a USB connection between an Android smartphone and a PC, through which commands are sent.
Read also: How to restore an Android device
In order to be able to do this, you need to enable the “USB Debugging” option in the settings of your Android smartphone. It is located in hidden section“For developers”, and to open this section (if it is closed), go to the “About tablet” section and click on the “Build version” item ten to fifteen times.
After you have turned it on, simply connect your Android smartphone to the PC (in Mass Storage mode, of course) and launch the program of your choice, then follow the instructions for working with it. You will have to think for yourself about which program to choose and how exactly to use it - the number of Android devices is too large for you to be able to say with confidence which ones work with one program and which ones work with another.
3. Using PC and ADB terminal
For those who do not know what adb is, we answer. ADB is a special protocol that allows your Android device to receive instructions from your computer via a USB cable. Due to the fact that ADB is part of the Android system itself, such commands in most cases take precedence over the phone manufacturer's security solutions.
For normal ADB work with your phone you will need at least:
- Computer with operating system Windows system 7 (newer operating systems may be unstable or not work at all with the necessary drivers);
- A set of adb drivers for your device (usually issued by the manufacturer);
- USB cable;
- Actually, a smartphone with the “USB Debugging” option enabled in the settings;
- An archive with an ADB terminal unpacked into the “X://ADB” folder, where X is a (preferably) non-system drive.
Root rights(Superuser rights) – provide the owner of the device running on the operating system Android system the ability to perform any operation. That is, you get full control over the system, which allows you to run specialized applications that significantly expand the capabilities of your smartphone, edit and change system files, optimize the operation of your device, and also perform many other operations. The need to obtain root rights may arise due to the most various reasons. The instructions below will be relevant regardless of what exactly prompted you to obtain superuser rights.
Obtaining root rights can be done using special utilities that automate this process and make it accessible even to novice users. The complexity of the procedure for obtaining superuser rights largely depends on the device itself. On some models this process takes only a few minutes, while on others you need to tinker.
As part of this review, we will tell you how to get root rights on Android using special programs. We will consider the most common and convenient ways getting root. To complete this operation successfully, you just need to follow the instructions we have prepared. Before you start getting root, we strongly recommend that you study in more detail what superuser rights are and what risks they involve.
- Attention
The procedure for obtaining root rights is simple and if you strictly follow the instructions, no problems will arise, but if you decide to take such a step, you must understand that potential risks remain. An irresponsible attitude towards the procedure can turn your device into a “brick”.
Advantages and disadvantages of root rights
Before you get root rights on Android, you need to decide whether this procedure is really necessary. Superuser rights have not only advantages, but also disadvantages. In principle, if you get root and later find out that they are useless, there is nothing wrong with that. Root rights can be removed at any time. However, no one will compensate you for lost time, so it’s better to think about everything in advance. To make it easier for you to make a choice, we will list the main advantages and disadvantages of root.
Root rights allow:
- Remove standard pre-installed applications, built-in services and other junk that is protected from deletion by default;
- Edit system files and programs;
- Activate additional functions Android;
- Install modified firmware and mods;
- Optimize the operation of your device, increase battery performance, overclock the processor;
- Work with applications whose functionality is only available if you have root.
Disadvantages of root rights:
- The ability to receive over-the-air updates from the device manufacturer disappears;
- Having root deprives the owner of the device of the right to warranty service(you can remove root);
- You can delete files, the absence of which could negatively affect the operation of the system;
- There is always a risk to commit critical errors, as a result of which the device may permanently fail without the possibility of recovery.
How to get root rights on Android: instructions

The difficulty of rooting a device depends on specific model. Sometimes it is enough just to install a special utility and follow a few steps. In some cases you will have to tinker, for example, owners of HTC brand devices must first unlock Bootloander. The guide below will apply to most models. If you are unable to root after following the instructions below, try finding a guide to rooting your model.
Before you get root rights on Android, you should familiarize yourself with information about the types of superuser rights.
Types of root rights:
- Full Root— permanent rights that remove established restrictions.
- Shell Root– an analogue of the above type with identical capabilities, but without access to the system folder.
- Temporary Root– temporary Root access(valid until the device is rebooted).
Most often you need to get Full Root, which provides maximum capabilities. Be careful after rooting with these features. When deleting standard applications You can delete a file, the absence of which will lead to problems with the system.
You can obtain superuser rights directly through the Android OS device itself or using a computer. In both cases they are used special utilities. As an example, let's look at the two most common programs.
Getting root rights using Framaroot
One of the most famous utilities for rooting devices running on Android OS is Framaroot. Supports a huge number of programs various devices. Framaroot allows you to get root rights on your Android device in one click, without using a computer. The utility is easy to use and will not raise any questions even for novice users. To get root you do not need to use ADB commands, system flash files and other similar actions. Everything is extremely simple, fast and clear. True, the list of supported devices is limited, so the utility may be useless for you. In any case, you should start with Framaroot, and if unsuccessful, resort to using other programs.
To get root rights with using Framaroot follow these steps:
- Download latest version programs from the official website http://framaroot.ru/;
- Install Framaroot from the downloaded apk file on your device (you must first allow the installation of applications from unknown sources in the Android security options);
- If your device is supported by the program, the screen will prompt you to select an application to manage root rights and a method for obtaining superuser rights;
- Select Superuser or SuperSU. Click on any exploit, for example Boromir. If all else fails, try another exploit;
- If successful, a window will appear with a smiley face indicating successful rooting of the device. For the changes to take effect, you need to restart the device.
As you can see, the process of obtaining root using the Framaroot program is extremely simple and does not involve any difficulties. The main disadvantage of this utility is that it does not support all devices. If you can't get superuser rights using Framaroot, try other options.
Getting root rights using Kingo Android Root
Unlike the Framaroot application, the Kingo Android Root program can be installed not only on Android, but also on a computer. As for the process of getting root, everything is also quick and simple. You can download the Kingo Android Root program from the official website of the developer www.kingoapp.com completely free of charge. You can install the program on Android or Windows. First, we recommend trying to get root through the application, and if that doesn’t work, root the device via PC.
To get root rights through the Android application, follow the link above, download and install the utility. After launching the application, start the rooting process by clicking on the corresponding button. Now all that remains is to wait for the process to complete and check whether your device managed to obtain superuser rights. To check whether you have root rights or not, install Root application Checker from Google Play.
If for some reason the method described above does not work for you, try getting root using the computer version of the program.
To get root rights via Kingo Android Root, follow these steps:
- Enable USB debugging on your Android device (in the settings, go to “About phone”, then tap on “Build number” several times until a message appears saying that you have become a developer. Go to “Settings” - “For developers" and check the box "USB debugging");
- Connect your device to your computer via USB;
- Will begin automatic installation necessary drivers(requires internet connection);
- After installing the drivers, the “ROOT” button will appear. Click on it and the rooting process will begin;
- If the message Unlock Bootloader appears on your smartphone, you will need to select Yes using the volume buttons and briefly press the power button to confirm your choice;
- Once the rooting process is complete, a “Finish” button will appear.
Framaroot and Kingo Android Root programs support a huge number of devices. If you did not succeed in getting root for your model following the given instructions, try to find a suitable guide specifically for your device.
Few people understand why kingroot is installed on Android .
This application with a loud name causes a lot of controversy about its security and even in some cases becomes a stumbling block for the user.
However, in some cases it is simply impossible to refuse it and therefore there is a need to figure out how to install it and how to use it so as not to cause irreparable harm to your own device.
Content:Installing the application
It is worth understanding the fact that if the application simply does not install, then there is a reason serious reasons from the operating system developer.
Essentially, kingroot on Android gives the user the rights that are available exclusively to developers by default.
Because in the wrong hands, these rights can lead to the fact that the use of certain functions will make the device vulnerable due to the influence of third-party software products.
That is why the installation of the program itself will not give the user anything, even if it is installed, despite the fact that with the default parameters it will be inaccessible.
To open access to this software product, it is necessary to carry out a number of the following manipulations:
If any user can handle the last couple of operations, then some will have to work hard with the first two.
The problem with the first operation is that, given the unquestioning trust of users in the described application, a number of attackers distribute modified copies of the program, which can illegally collect data from the device or carry out operations that are not approved by the user, for example, sending out advertisements or.
How to start developer mode
Depending on the firmware version of the mobile device, the process may differ slightly in detail, but in general it is identical for everyone.
First, you need to go to the settings menu, which is displayed even if you change the theme with the gear element. IN
Inside it you need to find the item marked “About phone”.
By launching it, you will have open access to a menu with relevant information. Inside it you need to find the item "Device Specifications".
When you select it, the following will be available reference list, in which to find the element "Firmware version".
After tapping on it, the necessary developer mode will become available, but this is for installation required application won't be enough.
Additionally, you will need to allow installation of applications not from the Google Play Store.
Please note: You also need to go to the settings item that appears "For developers", and inside do not activate the “USB Debugging” element.

Rice. 2 – Android device data
Working with the application
Once kingroot is installed on the device, you can start with it active work. Its special advantage is that the operating process itself is not complicated.
Conventionally, the program can be classified as a “one-click” program that performs the task assigned to it by the user in just one tap.
In this case, kingroot in one tap gives an ordinary user superuser rights or, as it is also called, root.
To receive them, you need to do just one action after launching - click on the button highlighted in green.
Meanwhile, a progress item will be shown, with numbers changing to indicate the percentage of actions completed, which the user does not need to manually perform.
Kingroot will check availability in software firmware vulnerabilities, which will allow you to provide the appropriate rights.
If the operation is successful, a note in orange will be displayed inside the circle with numbers indicating that a vulnerability has been found.
After this, the percentage of completed operations will change faster and eventually the number 100 will be set, which will instantly change to a message that the operation was successful.
After this, a special button “Get root” will become available. When pressed, the application issues the specified access.

Rice. 3 – Kingroot window
Removing root rights
It is likely that this utility will be useful to you on mobile device just a couple of times to install any specific software product, be it a special utility or a toy.
Therefore, to prevent other programs from intercepting superuser rights, it should be removed, first removing root rights.
This is easy to do. To do this, you need to click on the three-dot symbol in the running program, which will allow you to get to the settings menu.
Inside its lower part you need to select the command "Remove root rights".
After some manipulation on the part of the program, it can be safely deleted.
Root rights. Problems and solutions with KingRoot on Meizu
Analogues
It is worth noting that kingroot for Android is not the only program that can be used for this purpose.
If its installation fails due to the special protection of the smartphone or tablet firmware, then you can use several other software installed in a similar way.
These include:
They allow you to work with those firmware versions that are not available for the software product in question.
Unfortunately, not all of the utilities listed provide multi-root access, and in addition, not all of them have a Russian-language version.
It is also worth noting the existence of other applications that allow you not only to obtain such rights, but also to apply them in practice with maximum benefit.
These include KingUser and KingMaster from the same developer, often installed along with this software product.

Rice. 4 – KingUser Window
KingRoot - getting Root in one click
Kingroot is one of the new and promising “one-click” applications for obtaining Root on Android devices! This application does a great job with Android versions from 4.0 Ice Cream Sandwich to 6.0 Marshmallow.
Surely many have heard about administrator rights in phones and tablets based on Android OS, called Root access. But not everyone knows what they are for and how to use them correctly. Moreover, trying to gain administrator rights without the necessary knowledge can be fraught with problems. We suggest you understand what Root rights are on Android, and also find out how to use them correctly.
Root access, or as it is also called, superuser, can be obtained for any smartphone based on the Android OS. Rooted devices have greater capabilities for customizing personalization and managing system files/processes. In normal mode, the user works with the mobile phone as a guest. You can watch videos, listen to music and surf the Internet, which is already enough for most people. However, only with administrator rights does it become possible to radically influence OS processes, modify system files, etc.
Every coin has a downside, and Ruth rights are no exception. Along with the expansion of functionality, the user will lose the opportunity official update firmware and branded chips from the manufacturer. This is one of possible reasons, why don’t developers provide root access to their devices upon purchase.
Why are they needed?
As mentioned above, administrator rights significantly expand the user’s basic capabilities for working with the OS. The most significant functions that appear in rooted devices include:
- The ability to freeze and backup the current firmware on Android smartphones and tablets.
- Remove built-in advertising from applications installed in memory.
- Remove system (originally built-in) ringtones and programs.
- Add applications and ringtones to the system.
- Wide range of customization options: changing the design of application icons and backgrounds.
- Ability to edit .apk files, system programs.
- Extension of work period from battery, by optimizing energy saving parameters.
- The ability to increase performance and smoothness of work by disabling unnecessary system processes and tasks.
- Overclocking and underclocking central processor and video accelerator.
- Creating your own versions of Android firmware.
This is just the tip of the iceberg, the main features that are unlocked when you gain administrator rights. For each of them separately, there are several simpler ones that can be useful for many users. If you still don’t understand what administrator rights provide on Android, we recommend watching the training video below.
How to use?
Without the necessary knowledge, you will not be able to benefit from administrator rights on your mobile phone. To remove ads, change application properties, etc., you will need a special application, for example SuperSU. There are also several different types of root rights for Android, differing in duration and functionality. Let's look at everything in order, and start with preliminary preparation.
What to do before receiving
Before you get root rights in Russian for your mobile phone, you may need to unlock the bootloader. This operation will be required for devices: Sony, Lg, Huawei, HTC and some other popular brands. At the same time, you cannot do without a computer and special branded programs. Performing an operation official way, be also prepared for the loss of all data in the phone’s memory.
Types of Root rights
Depending on the need, you can get different types of Root access rights:
- Full Root. This is the most full view administrator rights. They are not deleted randomly or after rebooting the phone. With their help, the user gets full access to system files and processes, as well as the ability to write to the system section.
- Shell Root. Like full root, this type of rights is also not deleted after a reboot and opens up wide opportunities for the user. However, in this case there is no possibility of writing and rewriting to the system partition.
- Temporary Root. Represents a temporary type of administrator rights. This root access disappears immediately after the system is rebooted.
How to check their availability?
Another frequently asked question by users: how can I see if I have received administrator rights on my phone? There are two options for checking this:
- Need to open file manager, for example ES Explorer, and go to the /system/xbin section. If there is a SU file in this directory, then Root rights have been installed successfully.
- We download the Root Checker application, which is available in the Play Market, and through it we check whether administrator rights are available on the phone.
For verification methods, see the training video below.
Using the SuperSU utility as an example
After you have rooted your mobile phone, you need to install a special application on it, for example SuperSU. We will look at how to use administrator rights on this utility, since it is available in the Play Store and is convenient to use.
After you have downloaded and installed SuperSU on your phone, the program begins to monitor and manage system processes requesting root access. As soon as any application accesses a particular process, a superuser request is displayed on the screen. You can also set a reminder to repeat the request at any convenient time. You can study the history of such requests in a log specially created for this purpose. It contains all requests from the moment SuperSU started operating, opposite which the status (received or not received), time and date are displayed.
The first tab of the SuperSU utility work menu is dedicated to applications that have administrator rights. They can be configured in more detail or removed from this list by disabling the corresponding permission. Last tab in the utility, which can be opened by swiping sideways on the screen, there are settings. Here you can set the following parameters:
- Enable re-authentication to confirm access to administrator rights every time the applet is updated.
- Install permanent access to default root rights for all programs on the phone.
- Set the waiting time for a response before automatically refusing to provide Root rights for the selected application.
- Configuring log recording parameters.
- Changing visualization, graphic background and interface language.
- Activate survival mode.
- Using the utility as a system program.
A separate item is made for modification of user firmware, if the user uses it.


