What prevents us from knowing in advance what surprises Microsoft is preparing for us? Moreover, the start of sales of the long-awaited operating system is not far away, and its components such as Windows MovieMaker and Windows DVD Studio will no longer undergo changes compared to previous builds of Vista. Let's take a look at what Redmond will delight future users with Windows Vista, interested in digital video.
After installing the system, the first thing that attracts attention is the presence in the Start panel of four items that, to one degree or another, relate to processing, creating and viewing videos.
It seems that Microsoft developers have decided to introduce the positive experience of their Office into Vista, turning several disparate programs into an interconnected set of modules. Now the user can, using Windows Photo Album, select material consisting of photographs and video clips, perform simple actions on drawings and...

Click the Create movie button.
![]()
The next module will immediately launch - familiar to everyone from its XP incarnation of Windows MovieMaker. The files selected in the Photo Album are already located on the timeline, along with transitions between them, selected at random. What we see is a ready-to-publish slideshow that can now be exported to any available format.

MovieMaker differs slightly from its predecessor, which was built into Windows XP. The timeline still consists of only one video track, which does not allow you to overlay one clip on top of another; the maximum number of effects simultaneously added to a clip has not changed - there are still six of them. The composition of the effects and transitions built into the program has changed slightly: in MovieMaker version 5.1 (Windows XP SP2) the number of transitions was 60, now there are 64; the number of effects, which was 24, increased to 49.
But first things first. Now we will capture video from a digital video camera and create a simple movie. Only after this will we begin to think about how to publish our work. Perhaps we can create a DVD video disc using nothing but the tools built into Windows...
If the user is going to capture video, then it is better to launch MovieMaker with the digital video camera connected to the computer and switched to Play mode. Although the program is painfully familiar, it’s still worth looking into its settings. Team Tools > Options will open the program settings window, consisting of three tabs. As you can see, the set of parameters is still minimal, and no changes are observed here.
|
|
|


On the first tab, one of the important points can be considered the time interval after which the program automatically saves the project; on the second tab, the user can change the duration of display of photos when placing them on the program timeline, as well as the duration of the animated transition between them. Here you can select the aspect ratio and TV video format. Last tab contains a list of codecs available to the program that are installed in the operating system. What's interesting is that any of them can be disabled, making them inaccessible to MovieMaker.
Let's move on to capturing video, to do this we'll run the command Ctrl+R (File > Import from Digital Video Camera). Minimalism triumphs: field for entering the name of the cassette; selecting the location of the folder where the captured video will be saved; choosing a format for saving all simple settings. Separately, let’s just talk about formats: if the user plans to make editing with cutting/gluing video clips, applying effects, transitions and titles, then in this case it is recommended to select the first format in the list: DV AVI as a single file. The remaining two points (WMV as a single file and WMV with the file split into scenes) are recommended to be used if no editing with subsequent video transcoding is planned.

The next gigantic window contains only two items, the choice of which depends on the user’s wishes: it is not at all necessary to merge HDD an entire tape if you only need to capture a short minute-long episode.
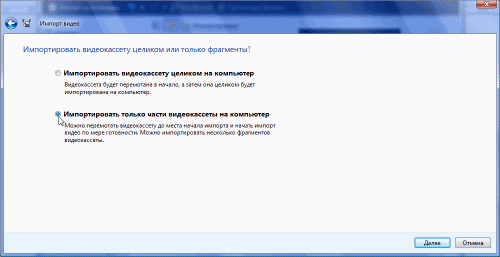
Finally, a window opened where the capture would take place. The camcorder is controlled here using standard buttons, and there is also an adjustable capture time limit. If the user selected the first item in the previous window, then you can safely press the button Start importing videos, and find more important things to do for the next hour and a half, while the tape is played and captured.

Once the capture is complete, the resulting clip will be automatically imported into MovieMaker, but with some differences. Even though the program created a single AVI file in the user-specified folder, the same file, when imported into the program, appears broken into scenes. Broken down not just by the time the camera was turned on and off (timecode), but also by optical feature (picture change).

If in the previous version of MovieMaker this division of the file into scenes could be disabled by unchecking the “Create clips after completing the wizard” item when recording video from the device, or from the “Create clips for video files” item in the file import dialog, now video is always broken into scenes, and this operation cannot be undone. However, it's not scary. The user can combine multiple clips into one at any time by selecting them and executing context menu team Merge:

Although, to be honest, there is no need to do this, because editing involves cutting out unnecessary, uninteresting frames. And it’s much easier to produce if the video is already broken into pieces.
It is unlikely that anyone who has at least once dealt with digital video has not tried to create their own project in Windows MovieMaker. It’s hard to imagine a more simple process. Apparently, the developers are so satisfied with this simplicity that they decided not to add any, even cosmetic, changes to the program. Every element, every command remained in its original place. With the exception of...

Except for one nice little thing: the ability to create a DVD video disc! To the great delight of users, the list available ways film publication located on the left side program window, replenished with item DVD.

When you click on this item, a warning will appear (where have you seen Windows without system messages?):

After an affirmative answer, a new module will launch, which now has a permanent registration in the operating system: Windows DVD Studio.

As you can see, this program cannot boast of a large number of settings; Even a hopeless beginner is unable to get lost at several points.

Everything is extremely simple: in the “Select DVD playback parameters” field, the DVD construction scheme is selected, in the “DVD proportions” section - the video aspect ratio (aspect), and in the third - the TV standard (PAL is used in Russia). By and large, there is no need to pay attention to the “DVD writing speed” parameter (except for cases when you plan to watch DVDs on a player that cannot read discs recorded on high speeds). And you should pay attention to the “Location of temporary files” item: this will help to slightly speed up the creation of the disk and its calculation. The fact is that any program that works with video, while processing the video, constantly accesses the source file, simultaneously writing the result to new file. And, if the disk is highly fragmented, or has a low rotation speed, operation can slow down greatly. To avoid this, click the Browse button and select a different hard drive than the one on which the original video material is located.

In total, the program has twenty different design styles, which should be enough in most cases.

You can change the themes yourself, although not without certain tricks. The files responsible for DVD design are located in the Program FilesMovie MakerSharedDvdStyles folder. It’s worth replacing them with your own and no one will be able to reproach the author for using widely replicated White light standard themes. True, this will require a lot of effort, because most menus are collections of carefully tailored templates consisting of graphic and video files. However, we can hope that in the near future the works of enthusiasts will appear on the Internet, which will help expand the design capabilities of the Windows DVD studio.
A big disadvantage of DVD studio: it is impossible to manually set the interval and placement of chapters on the disc being created. The program determines the location of chapters in the film independently, guided by the same principle according to which MovieMaker breaks the video into scenes, namely at the moments when the picture changes and the camera is turned on/off. However, if the project contains two or more video files, then in this case the chapters will be the files themselves imported into the project, and the intermediate chapters will disappear.
But let's get back to work. An important part of it is creating your own inscriptions in the menu. Shouldn’t we leave the faceless phrases “Untitled”, “View” or “Scenes”? Enter your text in the required fields and select a font that suits you.

In addition to the captions, the video shown in the menu can also be changed (by default, the program takes frames from the video imported into the project), background sound, and button design style.

If the user has added a folder with photos to the project, then it is advisable to make some changes in the slide show parameters. First, choose the musical accompaniment that will play while the photos are shown. When the melody is selected and the file is selected, it is best to check the box “Change the duration of the slide show according to the duration of the music”, rather than leaving the value fixed. True, in this case you need to mentally compare the number of imported photos and the duration of the selected melody, and calculate the average display time of an individual photo. It won’t be good if the photos flash at breakneck speed or, even worse, are shown on the screen for a long time, driving viewers into depression.

It should be remembered that at any time you can view how the DVD will look after performing a particular operation or changing any parameter. Button View always ready, when pressed, the program will start simulating the operation of a DVD video disc.
|
|


If after such viewing the user is satisfied with his work, he can proceed to the final stage: burning the disc. Unfortunately, Windows DVD Maker does not create DVD files on your computer's hard drive, instead offering to burn them directly to optical media.
However, it is not difficult to deceive the program: files ready to be written to disk are located in system folder temporary files, but are destroyed when the program exits. Thus, if the user simply wants to receive DVD files, he just needs to start rendering the movie with an empty disc inserted into the DVD drive, and then remove the disc from the drive without waiting for the burning to start and without closing the program. At the end of the calculation, the DVD studio will again ask you to insert the disc into the drive this means that the temporary files are ready; Now you can safely copy them to any folder and use them in the future at your discretion.
Time DVD creation directly depends on the amount of source material and its format. During rendering, the program not only transcodes all files into MPEG-2, but also processes all the effects that the user filled the project with while working in MovieMaker. The test creation of a 50-minute DVD video disc took about two hours (original video DV AVI, without applying effects and transitions; rendering was done on a computer with AMD Athlon 64 3200+, 1024 MB DDR SDRAM).

At the end of burning, the DVD studio will ask you to repeat the operation. There is no need to be afraid of another long wait - this time the program will just copy those same temporary files to the DVD.

Another annoyance: there are no tools for setting DVD output parameters in the program! This “protection from an incompetent user” has turned the program into a tool that cannot be used, since it does everything itself (although, perhaps, the vast majority of users are just waiting for it).
Pay attention to the disk full indicator in the lower left corner of the window where files are imported into the project:
The DVD studio believes that video encoded at such a low bitrate can be considered high quality. Perhaps this is so, if only we were not talking about amateur filming, with all its noise caused by the constant lack of lighting and the dancing of the operator’s hands.By creating several DVDs of different lengths, it was found that the final bitrate of the film is selected automatically by the program, and varies in the range from 8000 Kb/sec (with a disc duration of 50 minutes) to 3901 Kb/sec (with a disc duration of 150 minutes). Sound is always encoded unchanged: MPEG Audio, 48000 Hz, stereo, 224 Kb/sec.
There is also reason for joy: the program does not always necessarily re-encode the video. To verify this, a 30-minute file was prepared with characteristics that fully correspond to the files created by the DVD studio: this is MPEG2 video, 720x576, 25.00 frames/sec, 8000 Kb/sec. As a result, creating the disk took only 10 minutes (no doubt, that's how long it took to create the menu), after which the source file was compared with the final one. It's not hard to guess - they turned out to be completely identical.

So, the created DVD video is ready to add to your media collection, which can now be viewed using the powerful Media Center built into Windows Vista. It is significantly different from, their comparative reviews have already been published on the Internet, but for now we will limit ourselves to a series of screenshots.


The main and, perhaps, the only advantage of Windows Vista DVD Studio is its very appearance in the operating system, and, therefore, free (hardly anyone buys an operating system just for the sake of one particular module). In all other respects, the DVD studio is more than modest in its capabilities, inferior to similar programs in almost every parameter. It is worth mentioning that similar but separate programs are designed to perform a single purpose: DVD authoring. Such packages are not at all designed for the average user; their cost is often close to the cost of the entire operating system, and no one will ever compare Windows DVD Studio with a powerful authoring tool like Sonic Scenarist.
Procedure for manual download and update:
This built-in DVD Maker driver must be included with the Windows® operating system or available for download through the Center Windows updates® (Windows® Update). The built-in driver supports the basic functions of your DVD studio equipment.How to perform automatic download and update:
Recommendation: As a general rule, most Windows user, we strongly recommend updating DVD drivers-studio using a driver update utility such as DriverDoc. DriverDoc saves you time and effort by automatically downloading and installing the correct DVD Maker drivers.
DriverDoc can be used to automatic update not only DVD Studio drivers, but also all other drivers on your PC. This utility has access to a database containing more than 2,150,000 device drivers (the database is updated on a daily basis), thanks to which your PC will always have latest versions necessary drivers.
Install optional products - DriverDoc (Solvusoft) | | | |
![]()
DVD Studio Update Frequently Asked Questions
What are DVD Studio device drivers needed for?
The developer creates these small programs to make the DVD maker you use interact with the specific version of your operating system.
What operating systems are compatible with the drivers?
Fully supported by Windows.
How to update DVD Studio drivers?
You can update DVD Studio device drivers manually using Device Manager, or automatically using a driver update utility.
What are the benefits and risks of updating DVD Studio drivers?
DVD Studio driver updates improve compatibility hardware, expand its capabilities and improve productivity. Conversely, installing the wrong DVD Maker drivers can cause software crashes, slower performance, and overall computer instability.
About the author: Jay Geater is President and CEO of Solvusoft Corporation, a global software company focused on innovative service programs. He has a lifelong passion for computers and loves everything related to computers, software and new technology.
Search by DVD Studio driver manufacturers
Total pages: 1 Total items: 1
Install optional products - DriverDoc (Solvusoft) | |
Lately, few people use disks to transfer and store files; even modern portable players are capable of playing video files from flash drives. But still using DVD has not yet become extinct and many people use such disks.
It is precisely when you need to record such media that you may need a DVD studio. This standard application, which is built into the operating system starting from the seventh series. Of course, for recording discs it is better to use a specialized software, but if it is not on the computer, and you need to record it in a short time, then this the method will work. With the help of a studio, you can record information on a high-quality medium, but you cannot erase it from there, even if the disk is rewritable, such is the functionality. But here you can also make a high-quality design of the project. All these operations should be considered in detail, which will be done.
Starting the program
To open working window applications, you need to visit the “Start” menu and select “All Programs” there. In the list that appears, you need to find the “Windows DVD Studio” item and open it. After launch, the user will be presented with the main working window, which is quite understandable to all users. The main functional buttons are located conveniently and accessible.
To add files to the project, you can simply use the functions of the Document Copy Explorer or use the “Add” command, which will open an additional window. In it they are selected necessary files. To add several files at the same time, it is convenient to use the selection function. You can hold down Ctrl for this or select objects with the mouse.
To adjust the order of files at your discretion, you need to use the arrows in the drop-down menu on the file. It appears when you use a mouse button. Blue arrows change the position of the file when slide viewing the contents of the disk, depending on the user's wishes. If you accidentally added to the project extra file, it can be easily removed using the same drop-down menu by selecting the appropriate item. In this case, the document will remain on the hard drive, you don’t have to worry.
Once the project is fully formed, you need to select a recording device. If there are several of them on your computer, then you need to select the one in which the disk is inserted in the list of devices. After this, the name of the disk is selected at the request of the users. This is written in the “DVD Title” field. In principle, everything is ready for recording, but you can change some additional settings.
Extra options
After completing the main project setup process, you can use additional ones, they can be found on the left side in the lower corner. The options item is located next to entering the project name. The recording format, disc aspect ratio or playback characteristics can be configured right away.
The last option provides several configuration options. The first point determines that in the future, when you start the finished disc, its playback will be
start by showing the user the disc menu.
The next option will start playing the files, and only then show the user the disc menu, which is what its name says.
When selecting “Play videos continuously”, the user will immediately see the playing files, which will be played back in a loop one after another, without showing the menu.
Another proportions item allows the user to adjust the display proportions of files. This applies to both videos and pictures that will be shown as a slide show. Here you can define standard aspect ratios 4:3 or widescreen 16:9.
When setting the video format, you will need to select a signal encoding system. There are two options to choose from: NTSC and PAL, but the first option has a much higher frame rate.
You can also adjust the disc writing speed here. Many people believe that it affects the subsequent quality of the recorded files, but this opinion is actually wrong. This does not affect the recording quality, but the service life of the disc itself will be much longer if the recording speed is minimal.
During the recording process itself, the program requires space on the hard drive to store temporary data. You can define this directive yourself by clicking on “browse” and selecting the desired location. This function is very useful if you system disk little free space.
In the compatibility tab, you can uncheck programs that can interfere with the disc burning process.
Design creation
After all necessary settings After reproducing the project itself, it’s time to move on to its design. This is done in the ready to record window. Here you can choose one of the ready-made styles offered or create your own unique one. For this purpose it is used horizontal menu at the top of the window. These sections allow you to adjust many options. For example, in the text menu you can select your style, which will be applied in the disc menu, change the text names of the keys and add your comments.
To view all your fantasies in advance, you can click the “view” button at the top. If everything is in order, then you need to change the text, and if you still need to modify it, then “Do not change” is activated.
In the menu settings, you can adjust the background image or video, add music, or change the button design. To use a photo or video from your computer as a background, you must first add it to the background video menu using the browse button. The same must be done for sound file if necessary.
All this is reviewed in advance, as in the previous case, and saved or modified. To save the created look for later use when designing other projects, you need to click “Save as new style”. To show photos in slides, you need to select accompanying music and add it. Here you can use several musical documents, the main thing is to determine the sequence of their sounds using the arrows. You can set the speed of changing photos in the drop-down menu, and in order for the duration of the demonstration to coincide with the duration of the audio track, you need to select the item that changes the duration of the slide show according to the duration of the music. The transition from one file to another is also configured, and if everything is satisfactory, the project is saved.
Record
When everything is set up, you can record the project. This is done using the “Record” command, after which you need to wait for the process to complete. To save the project for future use the “File” menu and “save as”.
If you are the owner of an operating room Windows systems 7 and you urgently need to burn a DVD, and installing such a software monster as Nero will take time, you can use the pre-installed service of the system - Windows 7 DVD Studio.
The program is not designed for serious operations - you won’t even be able to erase a rewritable disc. However, you can still make a high-quality disc recording and even a good design.
Below we will look at all the features of this offer from Windows 7 along with step by step instructions actions.
Start of Windows 7 DVD Studio
If you have Windows 7 Home Basic version, then, unfortunately, this version does not have a DVD studio.
In the rest Windows versions 7 Open the “Start” menu, then “All Programs” and find the “Windows DVD Studio” shortcut.
In the window that opens, we will see a completely understandable interface - to add the files necessary for recording, simply click on the “Add” command and in the window that appears, select everything that we want to burn to DVD:

By the way, the function of holding the Ctrl key to add several files at once is very convenient.
If you want to change the order in which files are displayed in a DVD slide show, you can change the order of added selected files using the blue arrow icons - “Up” or “Down”.
An extra added file from the project (it will, of course, remain on the hard drive) can be easily deleted using the command at the top of the panel or by right-clicking on the file – “Delete”:

If your computer is equipped with several DVD burner drives, then in the “DVD Writer” section (in the picture at the top right) you can select the desired drive.
You can name the disc in the corresponding field – “DVD Disc Name”.
The project with the added files is ready. If desired, you can change the disc recording settings.
Disc burning settings
In the lower left corner of the window, near the field where you can enter the name of the disc (picture above), there is a “Options” button: here you can find options for playing a DVD disc, setting the disc proportions and selecting the format. If you click on “Options”, a window will appear:

DVD playback options:
- by selecting “Start with the DVD menu”, when you insert this disc into the DVD player, you will see the DVD menu on the screen;
- by selecting “Play video, then open the DVD menu”, when you insert this disc into the DVD player, the latter will start playing the video from the start, the DVD menu will appear only then;
- By selecting “Play video in continuous loop”, the DVD player will play the video continuously.
DVD Proportions – this parameter will help us adjust the display proportions of the slide show.
Below you can choose from the ratio of the image width to its height:
- 4:3 are the usual proportions;
- 16:9 is already a widescreen format.
Video format – select the video encoding system – either NTSC or PAL. NTSC has more frames per second.
DVD writing speed – Many people believe that DVD writing speed negatively affects the quality of the recording. This is a misconception, but the slower the recording speed, the better disk will be read by the player and, naturally, will last longer. Here the choice depends on your psychological attachment to the blank.
Temporary files – by clicking “Browse” we can specify a folder for storing temporary files during the DVD burning process. This option is useful if there is not enough memory on the C: drive to store temporary files.
Compatibility tab – here you can disable filters that are incompatible with Windows DVD Studio, which may cause problems during recording. However, for the average user this setting will not be particularly useful. But, knowing the name of these problematic video filters, you can disable them by simply unchecking the box.

Post design
Having completed the settings, you can customize the design of the recorded disc to your liking - customize the menu and slide show. Click “Next” and go to the “Ready to Burn DVD” window. Ready-made DVD menu styles are displayed on the right - if you don’t want to create something of your own, choose from those offered.
And for those who like to create their own unique styles, there are special sections at the top of the horizontal panel:
1. Menu text – available settings for the font that will be used in the menu DVD: You can change the name of the playback and scene playback buttons, and also add any text notes in a custom style.

By clicking on “View” at the top, we will see your creation, and you can save all changes to the font and inscriptions by clicking the “Change Text” option. You can cancel all this using the “Do not change” option.
2. Menu settings – settings for the appearance of buttons are available, background image, and can also be added to the menu soundtrack.

You can set a specific image or video as the background of your DVD's main menu by adding it to Background Video from Browse. And so that the background of the DVD menu is accompanied by music, we carry out the same operation in the “Sound for menu” field.
As in the previous section, we look at how all this will look using the “View” command, and save it with the “Change Text” command. Cancel all selections – the “Do not change” command. The created menu can be saved with the “Save as new style” command - this style can then be used for other disks.
3. Slide show – in this section we set up accompanying music – the “Add Music” button, select an audio file and click “Add”. 
You can add several audio files, and also set the sequence of their playback - the “Up”, “Down” and “Delete” commands.
“Change the duration of the slide show according to the duration of the music” – select this option so that the time of the slide show coincides with the duration of the music. In the drop-down list you can set the speed of automatic image changing.
In the “Transition” parameter we configure the effect of switching between images. Click “View” and if everything is fine, then click the “Change slide show” command.
Burn DVD
In the lower right corner there is the “Record” command - after all the settings, click it and wait for the recording process to complete.

Receive the latest articles on computer literacy directly to your Mailbox
.
Already more 3,000 subscribers
Disc Studio is a program that helps you burn files to CD, DVD and Blu-Ray discs. It can create both regular data discs and media with a specific type of content designed for playback on older players (Audio CD, Video DVD). In addition, the program provides a function for creating media with an automatically loading menu, ripping tools, as well as functions for writing and erasing RW disks.
Before you start, you need to select the type of disc you are going to burn. Next, a project window will open into which you need to move the recorded data. This can be done by dragging and dropping or using the “Add files” item on the left side of the window. Data conversion (if required) occurs automatically. When you are finished working on the disc project, the program will ask you to select a drive to burn to. You will also need to specify the burning speed and disc title. By the way, you can save the created project in your computer’s memory and return to working on it later.
Like any other similar program, Disc Studio can check a disc after recording, copy media, turn off the computer when finished, and burn onto several discs one by one. If you encounter problems at any stage of working with the program, we recommend that you contact


