It is no secret to many that UltraIso is one of best programs for recording Windows images of all versions onto a USB flash drive. That is, in essence, with its help you create a bootable USB flash drive from an iso image in just a few clicks. You will learn how to do this in this article.
It is also one of the best programs for burning a Windows image to a USB flash drive.
So, to start recording Windows 7 onto a flash drive via ultraiso, launch the program. The main window opens in front of us.
UltraIso main window
In it, select “File” -> “Open”.

Open the windows image
In the window that opens you need to select Windows image, which will be written to the flash drive. You had to download it in advance, for example on the Internet.

Selecting an image to burn
Select the iso image and click the “Open” button.
Now we insert the flash drive on which our image will be written to the USB connector.
Attention. There should not be any data important to you on the flash drive, since all of it will be destroyed during formatting.

Let's go directly to recording in UltraIso
A window will open in which you need to check that the flash drive you need is being used, and the recording method should be “USB-HDD+” and all other parameters as in the figure below.

Setting the parameters for writing a Windows image to a USB flash drive
First, click the “Format” button. In the window that opens, select the “FAT32” file system and check the “Clear table of contents” checkbox.

Preparing a flash drive for writing Windows to it

After a few seconds, the flash drive will be formatted. Click “Ok” and close the formatting window.
Now, in order to burn Windows 7 to a flash drive via ultraiso, click the “Burn” button and in the window that opens, click “Yes”.

Data Deletion Warning

Burning Windows 7 to a USB flash drive via ultraiso
The recording process will begin. After which you will need to close the Ultraiso program and your bootable flash drive will be ready for use. All you have to do is boot from the flash drive and you can start installing Windows.
The recording time depends on many parameters, ranging from the capacity and speed of the flash drive, ending with the volume of the image that you write to it. But on average, within 15 minutes your bootable Windows USB flash drive will be ready.
Now you know how to use UltraIso - Programs for writing windows to a flash drive to write Windows 7 and thereby make a bootable flash drive from ISO image A.
The best way thank the author of the article - repost it on your page
Every year, regular CDs or DVD disc and become less popular, they have long been replaced by external hard disks, USB drives and memory cards. In connection with this, manufacturers of laptops and computers have begun to equip their devices with built-in drives less and less.
This in turn causes a number of problems, such as when Windows needs to be installed. In this regard, many programs have been developed that can write an image of Windows 7, 10 to a USB flash drive.
These include UltraISO, distributed in two versions: free and paid. Let's look at it in more detail and create our first bootable USB flash drive.
Before you start
Before you start working with the utility, you need to download it in Russian or any other language convenient for you from official website by clicking on the green “Download” button. In most cases, the free option is sufficient.

I do not recommend downloading the utility from torrents, file hosting sites and other dubious services. Since there is a possibility of catching a virus that can not only destroy your current system, but will also be installed by default with new ISO way.
Once the download is complete, run the downloaded “EXE” file and complete the installation.
Also, first download the required ISO distribution. operating system.
Create a bootable USB flash drive using UltraISO
Now, after you have installed the program, run it as an administrator by right-clicking on it. This will help get rid of further possible problems.
Then follow the following instructions for working with UltraISO:
- IN top menu Click the “File” button and select “Open”. You can also use the hotkeys “Ctrl+O”.

- Select the Windows image that you want to burn to the USB flash drive and click “Open”. Make sure that it is located on one of the hard drive partitions, and not on a USB drive.

- A structure with all the files will be displayed, but by and large it is not important to us, so we move on.
- In the top menu, move to the “Bootboot” section and click “Burn ...”. Each version of the application may have its own translation, and therefore the names of the items may differ slightly. Be sure to take this point into account and, if necessary, look for similar item names.

- In the “Disk Drive” column select USB drive and click on the “Format” button.

- In a new window as file system set “FAT32”, leave all other options intact and click “Start”. Please understand that the formatting process will delete all data located on the USB drive, so first save all important information in the other place.

- After formatting is completed, close this window.
- In the main window, set the recording method to “USB-HDD+”, without changing all other parameters, click “Record”.

- Confirm the action by clicking the “Yes” button.

- After this, UltraISO will begin creating bootable flash drive, wait for the process to complete. Usually it lasts 5-30 minutes, it all depends on the speed of the drive and USB port to which it is connected.
After UltraISO has successfully completed burning the Windows image, you can close the application and proceed with the installation.
By the way, some users simply extract all the files from the ISO image using an archiver and transfer them to a flash drive. I would like to point out right away that this method does not work and you will not be able to boot from such a drive.
The method discussed above is universal and suitable for all versions of operating systems. So with it you can also burn the image Windows systems 10 to a flash drive through the same UltraISO program.
Second method: when there is only a folder with installation files
If for some reason you do not have a boot image or CD with the operating system ready, but you have a folder with installation files Windows files, then you can create a bootable USB flash drive using them as a basis.
How to do this using UltraISO:

After the process is successfully completed, you can restart your computer and begin installing the system.
Third method: when there is only a boot disk
And the last third option will be useful when you have an installation CD with Windows. In this case, you can make a bootable USB flash drive using UltraISO using it as a basis. In this case, you will not need to create a separate ISO image of this disk, which will significantly save time.
Detailed instructions:

Upon completion of the process, you will receive a drive completely ready for use.
What problems might you encounter?
Usually the process of working with the UltraISO utility goes smoothly, but in some cases problems may arise and additional questions. Let's look at the main ones.
- Cannot create a bootable USB flash drive with Windows XP distribution. The solution would be to use the WinSetupFromUSB utility or roll back the current date in the BIOS to 10 years ago. After installation, you can return the current date.
- The capacity of the USB storage device has decreased or it is recognized as a CD-ROM. In this case, formatting using the “ImageUSB” utility, which I discussed at the very end of the article about.
- Some users try to record several distributions at once; unfortunately, this is impossible to do.
- The program freezes or the recording process freezes. Most likely the problem is on the side of the USB drive, check its functionality.
- Sometimes there is a need to create a multiboot USB flash drive with a large set of utilities. In UltraISO, there is only one way to make such a drive - to burn a ready-made multiboot image. But you won’t be able to create it yourself. The WinSetupFromUSB utility can help here.
I tried to write the most detailed article possible, I hope that I succeeded and that you now know how to use the Ultra ISO program and can independently apply it in different situations.
If you have additional questions, ask them, I will help as best I can.
Detailed video instructions
Why do you need a bootable USB flash drive?
When we turn on the computer, it first boots software, which is responsible for the internal “iron” as people say. That is, initialization comes first motherboard, processor, random access memory, video cards and so on. This software is called .
This process usually takes a few seconds. After this there is an access to the memory medium (S/DVD disk, floppy disk, hard drive, flash memory, network drive) and searching for information about the MBR (master boot records) - a special code that is responsible for loading the operating system. Next comes the loading of the operating system (Windows/Linux, DOS). At this stage we may need a bootable USB flash drive.
For example, to install an operating system, or download a portable independent (live) operating system.
We remember that for a flash drive to be bootable, it must contain the correct MBR; if the ISO image that we want to burn does not contain the correct MBR, then the flash drive WILL NOT be bootable.
Those. It’s not enough to just write an image of the operating system onto a flash drive (it won’t become bootable), but you need to “stick” the main one there in a special way boot entry(MBR).
Therefore, now you will learn one of the options on how to make such a bootable USB flash drive using UltraISO Portable.
In the example, the operating system will be used Windows system 7, USB drive 4 GB, UltraISO 9.6.0 Portable, ISO file OS boot image.
Now, where and what do we take.
- Windows 7 itself (or even the tenth one) is bought (extremely rarely), mostly downloaded from . Such images of the system are usually so well “split” there that the “small ones” themselves recognize it as their own. (When the system first starts, a connection is made to Microsoft and Windows authentication occurs.)
- A flash drive is the main requirement that its volume accommodate the Windows image.
- Download the UltraISO program itself. The program is in English, and even with a key, so you will have to download from a file sharing service, but it will also be in Russian with a key. We choose.
Unpack the archived file and run the file UltraISO_Portable_unpack.exe

We determine the location where the files will be extracted and click the Extract button. In this package we find the file UltraISOPortable.exe and run it. 
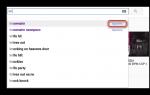
After the utility is installed, look through the program menu for the ISO image you need (this may be a disk image for Windows installations, or Linux, or any other utilities, such as antiviruses, error scanners, various editors).  After that, you will see the Windows image at the top left and its contents on the right.
In order to Windows installation occurred from a flash drive, it is not enough to simply copy the files from the Windows 7 installation disk to the flash drive. First you need to format the flash drive and make it active (that is, indicate that it is bootable).
If you have a disk image and you don't know what to do with it. Then install free program daemon tools light. This application allows you to open disk images as if they were virtual.
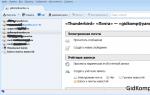
Now let's proceed directly to writing the disk image to a flash card. To do this, run UltraISO and select the section labeled “Bootboot” in the menu, select “Burn image” in the drop-down submenu Hard drive" and click on it.  Now you need to make some settings so that the flash drive becomes bootable after recording. You will see a recording window in which you need to select the USB-HDD+ recording type and after that you can start recording. But first, let’s format the flash drive if we haven’t done so before.
 After formatting, click the “Write” button
After you have indicated to burn the ISO image to a flash drive in the UltraISO utility, you will have to wait some time until the process is completely completed. 
And we look... 
That's all. Windows 7 ultraiso bootable flash drive created
Now let's reinstall Windows...
Next, we reboot the computer, if it does not boot from the flash, then in the BIOS we indicate that the boot should be done primarily from the flash drive (here it all depends on your BIOS) and then install Windows 7 as from a regular disk.
As you can see, making a bootable one from an ordinary flash drive is not at all a difficult task; the main thing is to understand the functions of the UltraISO utility, of which there are not so many. If you were unable to make the flash drive bootable the first time, then try formatting it in UltraISO first and then only writing the image onto it.
If for some reason you cannot activate the USB boot option in the bios, you can restart the computer and press the F11 key. A menu of devices you can boot from should appear. The key to call this menu may differ, so you can try several test reboots, and you will definitely be able to boot from the flash drive.
In order to install the Windows operating system, you need a boot disk or bootable USB flash drive. Almost everyone now has a flash drive, so it’s easier and more convenient to make a bootable flash drive. There are many methods and programs to create a bootable USB flash drive, for example Windows 7 USB DVD Download Tool. One of the most popular programs is Ultraiso. First, you need to download and install Ultraiso, download to HDD an image of the operating system that needs to be installed and insert the flash drive into the USB connector. When all this is done, you can proceed:
Launch Ultraiso |
||
|
Launch the Ultraiso program. Please note that it must be run with administrator rights. |
||
Opening the Windows image |
||
|
Now we need to open the image of the Windows operating system, which we will write to a flash drive. To do this, select Open from the File menu. You can also use the keyboard shortcut Ctrl+O. |
 |
|
|
Open the folder with the Windows image, select it and click on the Open button. |
 |
|
Let's start recording the image on the flash drive |
||
|
When the image file is open, select the item from the menu Write down image of Hard disk. |
 |
|
|
We select the flash drive on which we will write the Windows image (in my case (E:, 8GB) JetFlash Transcend 8GB), the recording method is usually suitable USB-HDD. When everything is selected, click on the Burn button. |
 |
|
|
All information on the flash drive will be deleted. We confirm this and click on the Yes button. |
 |
|
|
The process of writing an image to a flash drive takes several minutes. You can drink tea :) |
 |
|
Bootable USB flash drive successfully created |
||
|
At the end, a message will appear indicating that the recording is complete. To close the window, click on the Back button, then you can close the program. The bootable USB flash drive has been successfully created. |
 |
|
You can also use regular using Windows, for example, by restoration, but this is not always possible, so it is much easier to remove the old system and install a new one.
To restore you will need a disk or .
Let's look at the process of creating an image using an example Windows entries 8, although “seven” and other operating systems are written the same way.
Step 1. Getting started
To perform further actions, you will need to run the program as Administrator, otherwise the system will simply not allow you to do anything.
After you have opened the program, you need to click the “Open” menu as shown in the first screenshot and start creating a bootable ultraiso flash drive.

The example shows a prepared . The files themselves are easy to find on the Internet, in particular on torrent trackers. The extension must be ISO, not EXE.

Once you have confirmed the choice of image by clicking the “open” button, a list of used files will be displayed in the right window of the program.
Do not delete or rename anything to avoid any installation errors in the future.
Step 2. Preparing the image for recording
A pop-up window will appear again, once again warning that the data will be deleted. We agree with this and move on.

Now the fun begins - direct recording of the OS. Multiboot flash drive ultraiso began to be created , which will take some time.

The program itself works quite quickly and efficiently, but the system often slows down the entire creation process. Be patient.
Upon completion of the process, a notification will be displayed in the logs "Recording complete"! This means that our flash drive is ready Windows 8 ready to use.

Since we no longer need UltraISO services, the program can be closed.
When you connect the flash drive to the PC a second time, something similar to the one shown in the screenshot should appear.