Our next review is dedicated to the external housing for hard drives Zalman ZM-VE350. The box is designed for 2.5-inch SATA drives and supports high-speed USB 3.0 interface. The device is equipped with a virtual optical drive function, allowing you to connect ISO images on the fly. The write protection feature helps prevent damage to important files.
VIDEO REVIEW ZALMAN ZM-VE350
EQUIPMENT AND CHARACTERISTICS ZALMAN ZM-VE350
An external hard drive box that arrived to us for testing Zalman ZM-VE350 comes in a black cardboard box.
 Packaging Zalman ZM-VE350
Package Included:
Packaging Zalman ZM-VE350
Package Included:
- Boxing itself.
- Case.
- USB 3.0 cable.
- Set of screwdriver and four screws.
- Quick guide.
 Equipment Zalman ZM-VE350
The complete cable is 50 cm long, including connectors.
Equipment Zalman ZM-VE350
The complete cable is 50 cm long, including connectors.
 USB 3.0 cable
The case is very thick and it is easy to remove the device from it. You can, of course, use the box directly in the case, but we do not recommend doing this, otherwise the inserted drive may overheat.
USB 3.0 cable
The case is very thick and it is easy to remove the device from it. You can, of course, use the box directly in the case, but we do not recommend doing this, otherwise the inserted drive may overheat.
 Zalman ZM-VE350 in case
Specifications We have compiled the devices into a single table.
Zalman ZM-VE350 in case
Specifications We have compiled the devices into a single table.
| HDD interface | SATA, form factor 2.5″ |
| Device interface | USB 3.0 (backwards compatible with USB 2.0) |
| Device interface baud rate | USB 2.0: up to 480 Mbps; USB 3.0: up to 5 Gbps |
| Working with ISO images | Virtual optical drive |
| Indicator | Lights up when power is turned on, flashes when data is being exchanged |
| Nutrition | Power via USB |
| Dimensions | 131x79x13 mm (L x W x H) |
| Weight | 96 g (without storage) |
DESIGN ZALMAN ZM-VE350
Frame Zalman ZM-VE350 mostly made of painted aluminum with soft polymer inserts on the sides. On the front side there is an LCD display and an LED activity indicator.
 External hard drive box Zalman ZM-VE350
At the top end there is a Backup button and a USB 3.0 connector (Micro-B type, which also transmits power to the HDD) for connecting the supplied cable.
External hard drive box Zalman ZM-VE350
At the top end there is a Backup button and a USB 3.0 connector (Micro-B type, which also transmits power to the HDD) for connecting the supplied cable.
 Upper end of Zalman ZM-VE350
Glued to the opposite end Technical information about the model.
Upper end of Zalman ZM-VE350
Glued to the opposite end Technical information about the model.
 Bottom end on Zalman ZM-VE350
On the left side there is a push lever for navigating through the device menu, and the rest of the space is occupied by a soft insert.
Bottom end on Zalman ZM-VE350
On the left side there is a push lever for navigating through the device menu, and the rest of the space is occupied by a soft insert.
 Left side panel Zalman ZM-VE350
On the right side, except for the second such insert, there is nothing important.
Left side panel Zalman ZM-VE350
On the right side, except for the second such insert, there is nothing important.
 Right side panel Zalman ZM-VE350
The build quality is decent - buttons and body elements do not loosen. In general, the design gives the impression of being monolithic.
Right side panel Zalman ZM-VE350
The build quality is decent - buttons and body elements do not loosen. In general, the design gives the impression of being monolithic.
TESTING ZALMAN ZM-VE350
To install a drive into the box, you will first have to remove the module with the LCD screen, which essentially contains the entire contents of the device.

 Base unit Zalman ZM-VE350
For testing we took solid state drive Intel Solid X25-M and connected it to the internal SATA port.
Base unit Zalman ZM-VE350
For testing we took solid state drive Intel Solid X25-M and connected it to the internal SATA port.
 SSD connected to Zalman ZM-VE350 board
For reliability, it is worth clamping the module with the supplied screws - the holes for them are hidden under the folded edges of the soft inserts.
SSD connected to Zalman ZM-VE350 board
For reliability, it is worth clamping the module with the supplied screws - the holes for them are hidden under the folded edges of the soft inserts.
 Screw holes for Zalman ZM-VE350
To do this, we used the included screwdriver - fortunately, little effort is required, so the miniature size of the screwdriver is not a hindrance. It is worth noting that the kit includes twice as many screws as needed - four versus the required two.
Screw holes for Zalman ZM-VE350
To do this, we used the included screwdriver - fortunately, little effort is required, so the miniature size of the screwdriver is not a hindrance. It is worth noting that the kit includes twice as many screws as needed - four versus the required two.
 Zalman ZM-VE350 base unit secured with screws
After connecting to the PC, the display of our device turned blue and displayed a simple menu.
 Display Zalman ZM-VE350
At the same time, the operating system recognized two devices at once: the USB drive itself and an additional optical drive - completely virtual, as indicated in its name.
Display Zalman ZM-VE350
At the same time, the operating system recognized two devices at once: the USB drive itself and an additional optical drive - completely virtual, as indicated in its name.
 Zalman ZM-VE350 in task manager
This is precisely the main feature of this case - you can mount any ISO images by placing them in a folder "_ISO" on the disk inserted into the case. For example, downloaded from MSDN Windows image 7 was read without problems.
Zalman ZM-VE350 in task manager
This is precisely the main feature of this case - you can mount any ISO images by placing them in a folder "_ISO" on the disk inserted into the case. For example, downloaded from MSDN Windows image 7 was read without problems.
 Windows 7 image in Zalman ZM-VE350 virtual drive
However, our copy was initially with faulty firmware, and for the virtual drive function to work correctly we had to update software devices up to more current version. We attach the archive with the firmware and update instructions below. REMEMBER: This operation is carried out at your own peril and risk, and if you are not sure exactly what you are doing, it is better to contact technical support or a service center.
Windows 7 image in Zalman ZM-VE350 virtual drive
However, our copy was initially with faulty firmware, and for the virtual drive function to work correctly we had to update software devices up to more current version. We attach the archive with the firmware and update instructions below. REMEMBER: This operation is carried out at your own peril and risk, and if you are not sure exactly what you are doing, it is better to contact technical support or a service center.
- Instructions for firmware Zalman ZM-VE350 (122.7 KB).
- Archive with Zalman ZM-VE350 firmware (579.78 KB).
However, the drive function can be turned off completely - to do this, you just need to select the appropriate mode, of which there are three:
- HDD Mode – drive mode without a drive.
- VCD Mode – “only” mode virtual drive».
- DUAL Mode – simultaneous operation.


 Zalman ZM-VE350 modes
Another great feature Zalman ZM-VE350– ability to set write protection. This allows you to work even in a potentially or actually virus-infected system without the danger of contracting an infection. All you need to do is select “Enable WP” from the menu. The lock icon is shorted to start screen- and that’s it, no problem.
Zalman ZM-VE350 modes
Another great feature Zalman ZM-VE350– ability to set write protection. This allows you to work even in a potentially or actually virus-infected system without the danger of contracting an infection. All you need to do is select “Enable WP” from the menu. The lock icon is shorted to start screen- and that’s it, no problem.

 Installing write protection in Zalman ZM-VE350
Additionally, in the “Information” section you can see the storage temperature (let’s say right away that for SSDs it is determined incorrectly, don’t be alarmed), S.M.A.R.T. status, serial number and controller firmware version.
Installing write protection in Zalman ZM-VE350
Additionally, in the “Information” section you can see the storage temperature (let’s say right away that for SSDs it is determined incorrectly, don’t be alarmed), S.M.A.R.T. status, serial number and controller firmware version.


 Information about the drive in Zalman ZM-VE350
Now let's check the performance when using the USB interface. 3.0. IN HD Tune 5 the speed graph has an average read speed of 161.9 MB/s with a random access time of 0.169 ms. The CPU load was 9.8%.
Information about the drive in Zalman ZM-VE350
Now let's check the performance when using the USB interface. 3.0. IN HD Tune 5 the speed graph has an average read speed of 161.9 MB/s with a random access time of 0.169 ms. The CPU load was 9.8%.
 Result of Zalman ZM-VE350 (USB 3.0) in HD Tune 5
IN Crystal Disk Mark 3 sequential read and write speeds showed results of 250.3 MB/s and 96.19 MB/s, respectively.
 Result of Zalman ZM-VE350 (USB 3.0) in Crystal Disk Mark 3
Next, we switched to the USB 2.0 interface and tested the speed characteristics again. IN HD Tune 5 an almost flat graph shows that the drive’s performance significantly exceeds the capabilities of the USB 2.0 interface, so we have an average read speed of 31.7 MB/s with an increased random access time of 0.408 ms. But the load on the processor is only slightly higher – 11.5% versus 9.8% when transferring data via USB 3.0.
Result of Zalman ZM-VE350 (USB 3.0) in Crystal Disk Mark 3
Next, we switched to the USB 2.0 interface and tested the speed characteristics again. IN HD Tune 5 an almost flat graph shows that the drive’s performance significantly exceeds the capabilities of the USB 2.0 interface, so we have an average read speed of 31.7 MB/s with an increased random access time of 0.408 ms. But the load on the processor is only slightly higher – 11.5% versus 9.8% when transferring data via USB 3.0.
 Result of Zalman ZM-VE350 (USB 2.0) in HD Tune 5
Result in Crystal Disk Mark 3 also hit the USB 2.0 performance ceiling.
Result of Zalman ZM-VE350 (USB 2.0) in HD Tune 5
Result in Crystal Disk Mark 3 also hit the USB 2.0 performance ceiling.
 Result of Zalman ZM-VE350 (USB 2.0) in Crystal Disk Mark 3
So, the indicators correspond to the declared ones bandwidth even for SSD. So the box can handle a regular hard drive without any problems.
Result of Zalman ZM-VE350 (USB 2.0) in Crystal Disk Mark 3
So, the indicators correspond to the declared ones bandwidth even for SSD. So the box can handle a regular hard drive without any problems.
ZALMAN ZM-VE350: CONCLUSIONS
Price Zalman ZM-VE350 at the time of testing is approximately 4,000 rubles. For this money you get a fairly convenient tool that not only works as a portable one HDD, but also allows you to install the operating system from an ISO image on virtually any PC, and the images can be mounted right along the way. Boxing not only shows speed sufficient to SSD operation, but is also backward compatible with USB 2.0. At the same time, to ensure data safety, a write protection option is provided, with which you can work even on an infected computer without fear of losing files or spreading the virus further.
Pros of Zalman ZM-VE350:
- Support for mounting ISO images.
- Works with USB 3.0 without reducing the performance of the inserted drive.
- Write protection function.
- The metal body dissipates heat well.
Cons of Zalman ZM-VE350:
- No significant findings were found.
Zalman ZM-VE350 does not see iso. Solution to the problem.

 The other day I became the owner of a Zalman ZM-VE350. Since the main area of my work is related to computer repair and system administration, I desperately needed it. I had to buy it because I lost the Zalman ZM-VE300, about which a lot has already been said. But if you came to this article, then you know why you need it and what its main capabilities are. You can skip everything and go to the instructions.
Pocket ZALMAN VE300. For those who don’t know, this pocket is not just a SATA->USB 3.0 adapter, this pocket can also emulate in hardware an optical drive with any disk, the images of which can be uploaded to the HDD. Well, FINALLY I got this pocket at my disposal! True, this is not quite ZALMAN, and not at all at the price it was two years ago. But I think it's worth it)
(Price - $59 as of August 2018.)
Why didn't I buy the actual zalman? And because there are no more VE300 left in stores, they may have stopped producing it. More a new version VE350, but judging by the reviews, it works much worse than the 300th, and even latest firmware did not solve all the problems.
There are not many differences between IODD and Zalman - slightly different firmware, logos on the box and a different case. By the way, you can upload firmware from Zalman to IODD and vice versa.
Let's move on specifically to my purchase.
The seller offers pockets only in black (and also sells pockets 2541 (analogous to Zalman VE400)).
A working tracking number is provided.
Product ordered on March 29, received on May 3.
Packaging is a cardboard box containing the original box with the product.
Photos of parcels and boxes


Inside are two layers of cardboard... pallets or what? One contains a case and USB cable 3.0 (with SAMSUNG logos, 1 meter), in the case there is a bag with a screwdriver (the screws are not magnetized to it, it is very difficult to tighten anything) and 4 screws (only 2 are needed) and a warranty card.
The second “pallet” contains the actual pocket in the bag.


There are no paper instructions included, the seller offers to download an electronic version.
Also, the kit does not include a disk with the Backup Utility iodd 2531 utility, you can download it.
The pocket itself is aluminum, the upper part with electronics is plastic (acrylic and polycarbonate). 


Among the controls we have a lever that can be moved up/down and pressed, and a “backup” button. There is also a two-line monochrome display and an activity indicator (flashes white when connected via USB 2.0, and blue when connected via USB 3.0).
Comparison of sizes with external HDD and 2.5 HDD. Dimensions 136x78x13. 

The pocket is quite large and, unfortunately, does not fit into.
The included case is completely different from the gorgeous one that comes with the zalmans. Soft, ragy and too small (the lever is constantly pressed). 
Soldering quality: 


The holes for the screws are hidden behind the elastic bands on the sides. Screws connect the top and bottom of the pocket together. I do not recommend using the pocket without tightening the screws - top part together with hard drive You can pull it out simply by pulling the cable in the connector or shaking the pocket - the hard drive will push out the top part. 
Without the carrier, the pocket shows the inscription "iodd 2531". With the media, access to the menu appears. Current firmware: R1288N. The letter N indicates that the pocket is flashed with an NTFS version of the firmware. New ones, 1555 and 1558, are available on the manufacturer’s website. I’m not going to reflash them yet. 
The menu is called up by long pressing the lever. Move the lever up/down, press the lever - select a menu item, “backup” - back.
On the menu Mode You can select pocket mode (HDD, ODD, Dual).
IN Settings- adjust the brightness of the screen backlight, the time after which the screen will darken and set the factory settings.
Information- find out the status of the HDD, its model, serial number, temperature, pocket firmware version, USB mode and supply voltage (shows current and lowest).
IN USB Connect you can reload the pocket (new images will be loaded if you added them) and run safe removal(the pocket will disconnect the hard drive and the screen will say “Plug Out”).
On the menu Advanced You can “unmount” the hard drive and enable write protection on the hard drive. There is also a “Force USB 3.0” checkbox, but I can only guess what it does.
Some tricks that you won't learn about from the instructions
1. If you hold the button Reserve copy(BackUp) when connected, write protection will automatically turn on.
2. If you hold the left button while connecting, the protection will be automatically removed
3. If during operation the wheel is turned down and held, preparations will be made for safe shutdown devices. Pressing and holding the BackUp button will have the same effect.
4. If you turn the wheel up and hold it while working, the _ISO directory will be scanned. Convenient after recording new images on the HDD.
5. If the BackUp button is pressed in the Menu, it moves up 1 level.
6. Besides the Menu, the backup button is used for its original
data backup functions (if the backup program is installed and running).
As a storage medium I will use a Hitachi hard drive taken from a tortured service centers netbook. 


Preparing the disk for work: removing the first one hidden section manufacturer and create the main NTFS partition. 
If you partition the disk, keep in mind that IODD only looks for the _iso folder on the first partition.
After formatting, create a “_iso” folder on the disk and upload images to it. Declared support for ISO / VHD / VMDK / DSK / RMD / IMA.
I downloaded the images using utorrent directly to the disk.
After the update, the images were not mounted and the pocket with the word “Defrag” hinted to me that it would be a good idea to run defragmentation.
After defragmentation everything worked.
The image is selected using the up/down lever and mounted by pressing the lever.
Any images can be used. OS, boot disks, utilities, and even games. 


Despite the fact that the cable is long and soft, the pocket and disk work fine when connected via USB 2.0 through the front panel. The maximum consumption that I saw was 600mA (of course, this will also depend on the consumption of the disk itself). 
Measurements of disk speed in and without a pocket. 
As you can see, IODD has extracted everything it can from this disk.
Let's compare the speed of the disk in the drive (the image of the Win7 HP x64 installation disk is recorded) and the speed of the IODD virtual disk (the image is the same).
The maximum reading speed of my drive is 16x, Verbatim DVD-R 4.7Gb 16x. 

Let me remind you that if you install a faster hard drive or SSD in your pocket, rather than an old Hitachi, the speeds will be even nicer. And with such a hard drive, the reading speed is on par with CDs (48-52x). Well, the access speed is much better than that of any optical disk.
UPD Feb 2020
Because I got an extra SSD for experiments and tried to install it. Naturally, the speed was limited by the SATA2-USB3.0 converter.
CrystalDiskMark 
And once again, a comparison of the speed of a DVD and IODD disc with an installed hard and solid-state drive. 
Well, what can I say, this pocket will be an excellent helper for those who work with computers, especially those that do not have an optical drive.
Personally, I’m already tired of carrying my drive here and there and preparing an installation flash drive every time I need to install something.
The price, of course, is a little steep, but only the dollar exchange rate is to blame for this - at the old exchange rate, this pocket (like zalman) cost 1800-2500 rubles.
Thank you for your attention, I hope the review was useful, happy shopping, bye everyone!
And happy radio day to all radio amateurs and radio professionals)))

The kit includes an aluminum ZM-VE300 case, a thick carrying case, a USB 3.0 cable, an installation CD with programs, quick guide user and a small screwdriver with bolts for fixing hard drive.


Zalman ZM-VE300 has an impressive design: a lightweight aluminum case with plastic inserts on the sides, a small LCD screen that displays the status of the disk. On the top edge there is an activity indicator, a socket for connecting a USB cable and a “Backup” button. In addition, on the left side of the box there is a three-position joystick-wheel, with which almost all actions are performed. The activity indicator is two-color. White color is used to indicate operation in USB mode 2.0, blue - in USB 3.0 mode.


In order to install a hard drive in the Zalman ZM-VE300, you need to remove the top board with the display and connect the drive itself to it. Then insert the resulting structure into the aluminum housing.

Of the three 2.5" drives we tried, the Zalman ZM-VE300 refused to work with one, but accepted the other two normally. I didn’t find any pattern in its preferences, and, as it became clear from reviews on various Internets, I wasn’t the only one who had this problem. So it's probably better to have a few different drives ready.


When the disk is installed and functionality has been verified, you need to secure it. Bend the seal from the sides of the case; holes for the bolts are hidden under them. As I already said, bolts and a small screwdriver are included in the kit, so there shouldn’t be any problems with fastening. But the seal doesn’t want to go back up, since it is made of hard plastic and after bending it starts to hang out. A trifle, of course, but it spoils the impression. A regular rubber seal would look more harmonious here.

In the first Zalman ZM-VE300 models, the firmware only allowed working with drives formatted in FAT32 to support file system NTFS had to install alternative firmware from a similar device - iODD-2531. In new batches, the firmware is more recent, with it NTFS drives are perfectly supported without additional steps. Download latest version Firmware and programs necessary for updating can be found on the website.
ZM.VE300.Firmware.Upgrade.R1288N.zip (343,728 bytes)
In order to install firmware from iODD-2531 on Zalman-VE300, you will need to slightly modify the firmware program. I corrected the latest firmware version. After installing it, the device is identified in the system as iODD, but this will not work any worse. On the contrary, all new features from the iODD-2531 will be added to the functionality, which include official firmware Zalman-VE300 does not exist and is not expected.
iODD.2531.to.ZM.VE300.Firmware.Upgrade.R1600N.zip (345,755 bytes)
Entering and exiting the Menu occurs by pressing the side switch for more than 3 seconds. Navigating through the menu and selecting items is done using the joystick; returning to the previous level is done using the "Backup" button.
- Main menu:
- Mode Select- setting the device operating mode
- Setting- adjust the brightness of the LCD display and Sleep mode
- Information- view information about the HDD and firmware version
- USB Connect- USB connection setup
- Advanced- setting up a virtual HDD connection
- Mode Select menu:
- Dual Mode- work in combined mode, external HDD and virtual DVD-ROM/Blu-Ray drive
- ODD Mode or CD Mode(for iODD firmware) - works only in DVD-ROM/Blu-Ray mode (this mode is usually used when installing the OS)
- HDD Mode- the device is detected only as an external HDD (this mode is used when connecting to devices other than a PC)
- Settings menu:
- LCD Bright- adjust the brightness of the LCD screen backlight
- Idle Bright- adjustable LCD backlight in sleep mode
- Standby time- setting the time to go into sleep mode
- Load Default- return to default values
- Menu "Information":
- S.M.A.R.T- S.M.A.R.T information
- HDD Model- display the name of the hard drive model
- HDD Serial- display the serial number of the hard drive
- Firmware Ver.- display firmware version
- USB Speed- display the type of current connection (USB2.0: Hi-Speed, USB3.0: Super-Speed)
- USB Input Volt- display the lowest input voltage by USB port after connecting to PC and current input voltage
- Menu "S.M.A.R.T":
- HDD Temp.- display HDD temperature
- HDD Health- display the HDD status (Good, Warning, Bad). If a Warning or Bad appears, immediately backup all data and check the HDD
- "USB Connect" menu:
- Refresh- reconnect the device to the PC
- Safe Removal- safe removal of the device
- Advanced menu:
- Umount VHDD- unmount all disk and floppy images
- Write Protect- enable or disable write protection
- Instant Save- remember the image immediately after selecting it (only in iODD firmware)
- Force USB 3.0- USB 3.0 priority mode (only in iODD firmware)

It is not indicated anywhere in the documentation, but it has been experimentally established that there should be no more than 32 images in the “_ISO” folder at the same time, otherwise the Zalman ZM-VE300 will display the message “Too Many Files”. This can be easily circumvented by creating subfolders, although this still leaves a limit of 32 files per folder. There are alternative firmwares that do not have such a limitation, but personally, I have the entire necessary set of distributions in a dozen files. By the way, as a cheaper alternative to the Zalman ZM-VE300, unscrupulous sellers may offer you enclosures for hard drives of the brand Konoos. Such a replacement is far from equivalent, since low-end models of Konoos cases support only one image, while more sophisticated ones support only three. Naturally, online shopping sites are modestly silent about this.
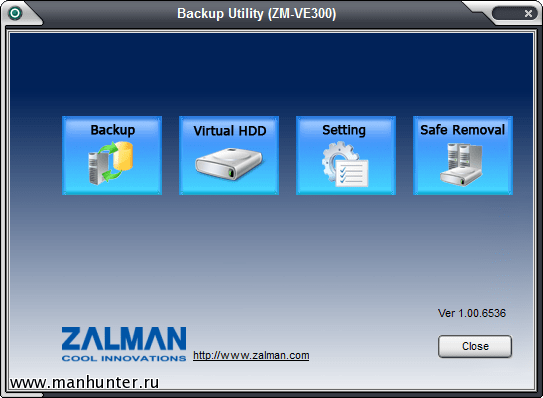
Included with the Zalman ZM-VE300 is a utility for backup copying Backup Utility. It's on CD, but latest version always available on the website. As you might guess, it is used to make backups selected files and folders from your computer to an external hard drive in Zalman ZM-VE300. In the program, configure the required paths, then click the “Backup” button on the box and the utility copies the information.

But that's not all she can do. Using Backup Utility, you can create virtual disks and then save them to the "_ISO" folder on an external hard drive. WITH virtual disks It's worth understanding better. "Virtual HDD" are empty files given size with the ability to connect them as external drives. Naturally, the Zalman ZM-VE300 is responsible for the connection and emulation functions.

Everything should also be clear with the “Safe Removal” function. You can safely turn off the Zalman ZM-VE300 by pressing the wheel or the "Backup" button on the device itself, or you can do this at the initiative of the computer through this Backup Utility function.
And this is how the system displays physical hard disks and virtual drives connected or created using the Zalman ZM-VE300.


Returning to the topic about installing Windows XP on the HP Mini 210-1130ER netbook. The inconvenience of installing the system from a flash drive was the last argument for me to buy the Zalman ZM-VE300. After purchasing it, I conducted an experiment: I recorded the prepared image on an external hard drive, installed a blank hard drive in the netbook, then mounted the image onto a virtual CD and tried to install the system. As I expected, everything went well.

The instructions that come with the kit are very sparse. All you can learn from it is where to attach the bolts and how to install backup software. There are instructions on the Internet for in electronic format, even translated into Russian, but in essence they are no different from the paper version. According to rumors, complete documentation is available in Korean, but this is unlikely to be of any help. So you'll have to be content with what you have.
Zalman.ZM.VE300.Manual.RUS.zip (546,663 bytes)
Zalman.ZM.VE300.Manual.ENG.zip (492,463 bytes)
Because the instructions are quite brief, and they do not describe all the capabilities of the Zalman ZM-VE300. In preparing this review, I collected from various sources and systematized useful tips And undocumented functions. Other possible problems discussed in detail at the IXBT conference.
- If you hold down the "Backup" button while connecting the device, write protection will turn on.
- If you hold down the joystick wheel while connecting, the write protection is removed and the device goes into “Dual Mode”.
- If you hold the joystick wheel up while connecting, the “ODD Mode” is set.
- If you hold the joystick wheel down while connecting, the “HDD Mode” mode is set.
- If you turn down and hold the joystick wheel during operation, the device will be safely turned off. The same thing happens if you press and hold the "Backup" button.
- If you turn up and hold the joystick wheel while working, the “_ISO” folder will be rescanned and the list of images contained in it will be updated. This is very convenient if new images were recorded on the device in “Dual Mode” or “HDD Mode”.
- In order for Zalman VE-300 to remember the last mounted image, it must be safely disabled. Install the desired image, press and hold the "Backup" button or scroll down, wait for the "Data Saving..." message and disconnect the disk from the computer. After this, Zalman VE-300 will start with the selected image.
- To unmount a floppy disk image or drive from a "Virtual HDD", you need to go to the "End Of List" item and hold down the wheel for 3 seconds.
- When connecting to a desktop computer, it is better to use the USB ports that are located on the back system unit, not on the front panel.
- If the hard drive installed in the case is divided into several partitions, then the partition with the "_ISO" folder should be Primary.
- It is not recommended to install SSD drives in the Zalman ZM-VE300, as they are more sensitive to insufficient power supplied via USB and may fail.

The most convenient way to defragment files and directories is to use free program WinContig. Her main feature- fast defragmentation separate files without having to defragment the entire disk. Just launch WinContig, select one or more image files and defragment, after which the Zalman ZM-VE300 quietly mounts everything.
What can I say to sum it up? Zalman ZM-VE300 is a very cool thing that justifies its cost to the penny. Now the problem with preparing installation flash drives and a stack of CD/DVD disks with different distributions has been solved once and for all; all this remains a thing of the past. The Zalman ZM-VE300 will be an excellent assistant for system administrators and advanced users who often have to rearrange the system or use different boot disks.
Despite all the advantages, there are some disadvantages. Neither the instructions nor the website contains a list of recommended hard drive models that work with the Zalman ZM-VE300. As a last resort, it would be possible to indicate the recommended characteristics, such as amperage and rotation speed, so that you can independently select the desired model, but this information is not available anywhere. The USB cable included in the kit is short and VERY stiff, which is why there is a risk of damaging the housing connector with frequent use. It would not hurt to provide additional power so that the Zalman ZM-VE300 can be connected to older computers. Of course, no one bothers you to find and purchase the right cable yourself, but it’s strange that the manufacturer made such a wonderful device and saved on a cheap cable. Judging by the reviews, for some hard drives you have to add an additional seal to the case so that the drive does not hang around inside. In my case this was not necessary, but in general I agree that the fastening system could have been thought out better. Otherwise, I am very pleased with the purchase.
UPD. After the untimely death of the Zalman ZM-VE300 (connected it to a problematic system unit, and there was a breakdown of electricity on the USB port), I purchased the original iODD-2531. So, there are no problems with seals described there. They are of sufficient length and have “horns” at the end, which are tucked under the side plugs and hold perfectly. Zalman also has these “horns”, but the seal itself is shorter, as a result they are useless. The cable is also long and flexible. The only thing is that the iODD case is uncomfortable - soft. I replaced it with a vacant case from Zalman. So it makes sense to purchase original iODD devices, rather than crookedly copied replicas.
An external hard drive today has become one of the essential items for everyone whose activities are in one way or another related to PC maintenance. The choice of discs and containers is large - for every color, taste and budget. However, there are solutions that stand out noticeably in the general series, one of them can be called an external container Zalman ZM-VE300 which, in addition to the function of an external drive, can act as a drive emulator optical disks.
This allows you to kill two birds with one stone, since an external ODD drive and a stack of disks for it are the same essential items for system administrators, service engineers and simply computer enthusiasts. Installation discs with the OS, various service and diagnostic Live-CDs - in the end we get a rather impressive list of disks that you should always have with you, and important drives not yet in one copy. Otherwise, it will be very unpleasant when, at the most crucial moment, a “worn out” disk refuses to be read.
But first things first. At first glance the cost Zalman ZM-VE300 may seem very overpriced, paying about 2000 rubles for an external container without HDD, even from a famous manufacturer, is somehow too much, for this money you can easily get a good one external drive. But this is only at first glance; as we will see later, the device fully justifies its price.
The container is supplied in a medium-sized cardboard box, on which the manufacturer emphasized the main advantages of the device.
It's obvious that Zalman ZM-VE300 in virtual drive mode, it is significantly ahead of any existing optical drive. Even in USB 2.0 mode, which is the main one, when using this container as boot disk, currently only Windows 8 can be loaded via USB 3.0, and even then not always successfully, since USB 3.0 controllers from different manufacturers have their own characteristics.
To evaluate the performance of the virtual drive as a bootable one, we compared the startup time of the Ubuntu 13.0 LiveCD by burning it to new disk DVD+R.
Optical drives showed quite expected results: the external drive is the slowest, the internal drive is slightly faster. Zalman ZM-VE300 once again showed a significant lead - loading the image in less than a minute. This is a truly excellent result, which will be appreciated by those who often boot their PC from optical discs.
conclusions
We have before us a truly excellent product that fully justifies its price. Its main advantage is a virtual optical drive, which will allow you to abandon the use of optical discs and external drives. In addition, a virtual drive allows you to work with disk images much faster than any other optical drive. All this does Zalman ZM-VE300 an indispensable assistant for administrators, service engineers and simply computer enthusiasts.


