Hello friends! Today's article is about Mail.Ru cloud storage. Let's look at how to use the cloud via the web interface:
How to upload files there and share links to them;
How to create folders and configure access to them;
How to move, rename and delete files.
How to create documents, spreadsheets and presentations directly in the cloud.
And other subtleties of use.
The beauty of anyone cloud storage is that it provides additional space for storing files online.
No need to clutter up your computer again.
It’s convenient to share files with other people (just open access via a link).
And since I have Mailbox on Mile, I decided to use this storage facility as well. Moreover, 25 GB of memory is available for free here. Insert from 2018 - now they give 8 GB for free.
In general, this is all theory. And we will move on to practice.
Watch my video instructions for working with the Mail.Ru cloud below:
So, as you already understand, to gain access to the cloud on Mail.Ru you need to register a mailbox here. By doing this, you create your account through which you can use other Mail services, including cloud storage.
Although it is not necessary to register a mailbox, you can use Mail to log into your mail located on another service. I showed this in the video (watch from the 11th minute 46th second). Thus, your mailbox, for example on Yandex, will open in the Mail.ru interface and you will also be able to use the cloud.
To go to the cloud, being on the main page of Mail.Ru, you need to click on the “All projects” tab and select “Cloud”.

Initially, pictures and a video file are already loaded there, which you can delete. Delete files possibly in several ways. If you need to delete several files at once, mark them with a checkmark and click on the “Delete” button at the top.

Or right-click on the file and select “Delete”. Again, if you have marked several files, they will all be deleted.

And one nuance - in the Mail.ru cloud there is no basket into which deleted files, as on the same Yandex disk. From there we can restore them. We delete it from the cloud immediately!
To add files from your computer to the cloud, use the “Download” button in the upper left corner.

You can upload using the “Select files on your computer” button, or drag them into the upload window with the mouse. There is a limitation - the uploaded file size is up to 2 GB.

Next to the “Download” button we see the “Create” button. We use it for creating folders, documents (Word), tables (Excel) or presentations (power point) directly in the cloud.

If you want to organize your files in the cloud, then create special folders for them. To move file to folder, select it with a checkmark, right-click, select “Move”.

A window will open in which you can select a folder to move or immediately create a new one.

Generally, we can use the right mouse button for different actions on files– delete, move, copy, download, generate a link for other people or send by mail. It is very comfortable.

By the way, if you need download several files from the cloud at once. You select them with checkmarks and they will be automatically packed into one archive for downloading.
![]()


If you share a file temporarily and then want to remove this link, select required file mouse, right-click and select “Delete link”.

All your files to which you have shared access can also be found in the “Sharing” section.

If a link to a file from the Mail.Ru cloud was shared with you, then you can download it immediately or save it to your cloud. You will have the option to specify a folder (where you want to save this file) or you can create a new folder.

Now a few words about setting up access to folders. You can open general access for any folder with the ability to edit. That is, other users will also be able to add files to this folder.
To set up access to a folder, check the box and click on the “Set up access” tab.

Editing access can only be made available to individual members you invite via email.

If you are going to send an invitation to a user with a mailbox other than Mail.ru, then he will receive the invitation only if he logs into his mail via Mail. More about this Here.
This user will see the following invitation in their mailbox:

Having accepted it in his cloud, in the “Sharing” section, he will find the folder that you opened for him and will be able to add his files to it. You, in turn, will see all the changes he made in your folder.
I wish you success!
Sincerely, Victoria
In this tutorial I will show you how to log into your Mail account. We will learn how to log into mail.ru email on your computer and phone, receive and send letters from it. We’ll also talk about what to do if you have problems logging in.
Mail login
Mail Mail is the most popular free email messaging service on the RuNet. Through it you can instantly send and receive letters from any country in the world. They are delivered in a few minutes and, in addition to text, can also contain files: photographs, documents, music and videos.
If you already have a mailbox in Mail, now I will show you how to access it correctly. And if you don’t have such an email yet, you first need to register in the system. Read about it.
How to log into your mailbox on a computer
You can log into my Myla page from any computer: PC, laptop or netbook. Even from someone else’s computer: at work, school or in a club.
To do this, you need to open your browser, go to the mail.ru website and enter your login information. Now I will show you how to do it correctly.
On a note . A browser is an Internet program through which you work on the Internet. It could be Google Chrome, Yandex, Mozilla Firefox Safari Internet Explorer or another program.
1 . Open new tab.
2. IN address bar type mail.ru and press the Enter button on your keyboard.
Loading home page Mail.ru website To get to your mail, you need to enter your login information in the rectangle in the upper left corner.

The program may have already filled in your data from a previous login. Then just click on “Mail”. Immediately after this, your box will open.

3. In the “Mailbox name” line, type your email login. Login is the part of the address before the @ sign.
For example, if the mailbox address [email protected], then you need to type ivan.petrov56 in this field. No spaces and no period at the end.
If the mailing address ends not in mail.ru, but in list.ru, or bk.ru, or inbox.ru, then click on the adjacent @mail.ru field and select the desired ending.

4 . In the “Password” line, type the code for your mailbox (it will be typed in dots). Then click on the “Login” button.
If you open your mail on someone else's computer, uncheck the "Remember" box.

Will open Personal Area on the website mail.ru. This is your email Mail. It looks something like this:

On a note . I just showed you how to log into mail.ru via a browser. But you can work with letters in another way - in special program(mail client). The most popular such program is Microsoft Outlook. But there are others: Windows Mail, The Bat!, Mozilla Thunderbird, Apple Mail, etc. Read more about setting them up at the link.
How to log into mail from your phone
On modern mobile phones and tablets, you can fully work with Mail mail. There are two ways to do this - through a browser or through an application.
Logging in through a browser is when you launch an Internet program and log into your email account. An application is a separate program that is installed on a mobile phone. It is more convenient to work with mail through the application.
Methods for logging into mail.ru mail from a smartphone or tablet
Login via browser
1 . At the top of your browser, type m.mail.ru and go to this address.

2. Click on the inscription "Mail".

3. In the “Login” field, type the name of your mailbox before the @ sign. For example, if the name is [email protected], then you need to print ivan.petrov56
If your mailbox does not end with mail.ru, then in the adjacent field, where it says @mail.ru, select the desired ending. This could be @inbox.ru, @list.ru, @bk.ru.
4 . In the “Password” field, type the password for the mailbox and click “Login”.
If you access your mail not from your device, but from someone else’s, then remove the checkbox from the “Remember” item.

A list of incoming emails will open. That's it - you're logged into your email inbox!

Mobile app
Working with emails through a browser is convenient, but only if you rarely use email. Rarely means no more than once a week. In other cases, it is better to use an email client. This is an application that helps you quickly receive and send letters.
But there is another option - the official Mail.ru application. It has more features:
- Search through all letters in the mailbox
- Grouping emails by subject
- You can add multiple mailboxes and quickly switch between them
- You can add not only Mail boxes, but also other services: Yandex, Gmail, Yahoo, etc.
- Eat The address book, personal spam filter, flagging and much more.
You can download the official Mail.ru application using the following links:
Mail.ru mail registration
You only need to register if you don’t already have a mailbox in Mail. After all, registration means creating a new email with a new address. If you already have a mailbox, you don't need to register!
1 . Open a new tab, type mail.ru in the address bar and press Enter on your keyboard.

3. Fill out each field of the form.

Name . Type your name.
Surname . Type your last name.
Date of Birth . Enter the day, month and year of your birth.
Floor . Select gender - male or female.
Desired postal address. In this line you need to type the name for your future box. You can use both letters and numbers, as well as a period, underscore, or hyphen. But the letters must be typed in the Latin alphabet, because all addresses on the Internet are only in English.
Pay attention to the end of the address. Initially it is @mail.ru, but you can choose something else: @inbox.ru, @list.ru or @bk.ru.
Password . Here you need to print the code with which you will open your box. It must contain English letters and numbers. At least six and no spaces.
Password confirmation. In this line you need to type the same code as in the previous field.
Telephone . Here the site asks you to type your mobile number. This is not required, but I highly recommend including it. After all, if problems arise with access to the mailbox, the easiest way to restore it will be through your phone.
Example of filling out the registration form

When all fields are completed, click the “Register” button. The system will ask you to print the numbers from the picture, and then your new email account will open. You can use it immediately - send and receive letters.

Learning to use an email account
All actions with mail take place in the user’s personal account. Through it we receive and send letters, photographs and documents.
Your mail.ru personal account looks like this:
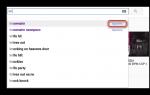
On the left side there are folders:
- Inbox - all received messages are stored here.
- Sent is the folder where sent messages go (they are duplicated in it).
- Drafts is a folder where your unsent messages are saved. Through this folder you can restore a letter after a failure.
- Spam - advertising junk is placed here.
- Trash - emails that you have deleted from your mailbox are stored here.
The most important folder is the Inbox. All new messages (except spam) go into it. Not yet highlighted in bold open messages, and light blue - those that have already been opened.
To open a letter, you just need to left-click on it.
How to send a letter
To write and send a letter, click on the button labeled “Write a letter” in the upper left corner.
![]()
Loading new page. In the “To” line, type email address the person you want to write a letter to.
On a note . All addresses on the Internet consist of letters of the Latin alphabet (English). Approximately in the middle there is an @ sign, after which the mail site is written. There is no period at the end. Example: [email protected]
In the “Subject” line, type the subject of the letter, that is, briefly say what it is about or from whom. You can print the topic in Russian letters.
The text of the letter is printed in a large white field. If there is a lot of text, this field will automatically expand (a slider will appear on the side).

After you fill out the required lines, click the “Submit” button once and wait a few seconds. If everything is in order, a page will load that says “Your email has been sent.” A copy of the letter will remain in the Sent Items folder.
How to send a file
To send a photo or document, you need to do the same as when sending a letter normally. Namely, fill in the “To”, “Subject” fields and print the text of the letter.
But just before you click the “Submit” button, you need to add a file inside. To do this, click on the “Attach file” sign (under the “Subject” line).

A small window will appear. Find in it the photo, document or other file that you want to send and double-click on it with the left mouse button.

The window will disappear, and the letter will show the file you added.
The mail.ru website does not open - what to do?
Check if it opens on other devices: on your phone, on another computer. If it opens, then the problem is on your side - most likely it is a virus.
If Mail does not open anywhere, then in this case we are talking about blocking it.
I wrote in detail about how to solve these problems in the VKontakte login article, in the part “What to do if you have problems logging in.” The principle of operation is the same, only wherever vk.com is written you will have mail.ru.
I'm trying to restore access to my mail, but the error "The specified mailbox does not exist" pops up.
This error appears in one of two cases: either you made a mistake when entering the address (see), or the mailbox was deleted.
By the way, according to the rules of the mail.ru website, the administration can delete an address if it has not been used for 6 months.
Is inbox.ru, list.ru and bk.ru mail also Mail?
Yes, these are also Mail's addresses. But these are all different consoles, and therefore different electronic mailboxes. That is [email protected] ≠ [email protected] ≠ [email protected] ≠ [email protected].
I didn't find the answer to my question
Try searching the official help desk or ask your question in the comments to the article.
Cloud services are a modern trend in the field information technologies. The cloud began to be called any remote server resources that allow solving various current user tasks related to digital information: storing files and archives, hosting websites, working in various paid programs without their direct acquisition. Let's consider using a cloud service for storing files from the Mail.ru company.
How to use the Mail RU cloud through a browserWe offer quick guide on the functions of the cloud service from Mail ru.
- To start using the cloud from Mail ru you need to have a registered account at mail.ru. If you don't have an account yet, register one.
- After registration, go to home page cloud service at https://cloud.mail.ru.
- Check out License agreement, accept its terms and proceed to working with the service by clicking the button Get started.

- To upload your data to the cloud, click the button Download and select on your computer drives necessary files. The maximum file size that can be downloaded through the browser is 2GB. After downloading files, you can perform the necessary actions with them: rename them, provide them for downloading, move them into folders, and so on.

- To get a link to the downloaded files, where anyone can download the data, select the downloaded file and click the button Get the link.

Copy the link from the window that appears. - If after some time you want to prohibit downloading a file from your cloud, then select it and press the button Remove link. The file will only be available to you from the cloud control panel.

- To organize the downloaded files, it is recommended to place them in the appropriate folders. Folders must first be created by clicking the button Create and select the item in the menu that appears Folder.

- To delete files that no longer need to be stored in the cloud, mark these files and click the button Delete.

- In addition to storing files using the Mail.ru cloud, you can create a document, tables or presentation, that is, analogues of documents with which I work in office Word applications, Excel and Power Point respectively. For creating specified files in the cloud click the button Create and select the desired item from the menu that appears. It should be noted that functionality in the cloud are significantly more limited than what you can get using similar Microsoft Office applications.

- If you have been sent a link to download any file stored on the Mail.ru cloud, then you do not have to download it to your computer, but save it to your cloud. To do this, click on the button with the image of a cloud and select a folder to save the data.
How to use the Mail ru cloud through the application
It’s even more convenient to use the cloud not through a browser, but using applications that can be installed for all popular computer platforms, as well as smartphones. One of the benefits of using apps is that they can upload files up to 32GB in size. How to use the application:  As the Mailru company itself states, using its cloud service, the user no longer needs to worry about the safety of personal data and it will always be “at hand” on any device. We can only take his word for it and/or check the validity of this statement.
Upon entering Post service, the page with incoming letters immediately opens. Most likely there will be welcome and thank you letters from the site administration. To open a letter, just click on it with the left mouse button. All unread messages are marked with a blue circle, read messages are marked with a light gray circle.
The number of unread letters is indicated next to the word “inbox”, at the top of the page label and in all projects associated with the mail service (listed at the top of the page), for example, “my world”, “classmates”, etc.


By clicking on these circles, you can mark unread messages as read and vice versa.
On the left side of letters, you can check a box so that one action can be applied to several letters at once, for example, delete, send to spam, etc.

The color icon is usually set by the service itself, the color is chosen randomly, and the first letter of the name or email address is used. The sender is written next to the icon - this is either the First Name and Last Name, and if they are not specified, then only the email address. Next comes the bookmark; when you click on it, it changes color from gray to red so you don’t forget about important messages. To the right of the bookmark is the text of the letter's header; if there is no header, it will be indicated that the letter has no subject. And on the very right side is the time or date the letter was received.
Sent or outgoing emails. The appearance of the letter is similar to that of incoming letters.
Drafts are letters written but not sent.
Spam is unwanted emails, usually of an advertising nature. If you send a letter to spam, then all subsequent letters from this author will also go to spam, bypassing the page with unread letters.
Trash – page with deleted emails.
With further use, your incoming emails will be replenished. A page can accommodate up to 25 letters; if there are more letters, a transition to other pages will appear. To go to an old message on another page, you need to find a link under the messages that goes to other pages and select the one you need.

You can go to page 5 right away; if there are a lot of letters, you will have to jump every two pages until the desired one appears. When you click the arrow, the next or previous page is loaded, depending on which direction you scroll.
Hello, dear readers of the blog site. Today we will talk about another cloud service, this time from . First, some lyrics. I still have two working on my computer hard drives, which are already twelve to fifteen years old, and maybe more. “So what, it happens,” you say. Yes, but...
Over the past few years, I have thrown into the trash about six or seven hard drives that were between two and four years old, but they all failed one by one. Components now (and railways in particular) are extremely unreliable (apparently this is a conspiracy to sell more and more new volumes, because quality does not depend on the manufacturer). Therefore, all important and not so important information has to be backed up. .
Now I'm on Dropbox, but the free gigabytes I received for installing their application on my S3 mobile phone are coming to an end. Paid package due to the devaluation of the ruble, the price almost doubled. Therefore, now I am at a crossroads - either strangle the toad, or look for an alternative free cloud.
Option clouds from Mail.ru I liked the big ones free service the size of the storage area is 25 GB (on my old Mail.ru account I even got a hundred for undivided use) and its fairly large popularity in RuNet. However, let's take a closer look at the product...
Opportunities of [email protected] in comparison with competitors
Previously, the corporation had a project called Files Mail.ru and provided users with the ability to exchange files. Files had a number of restrictions on the size of transferred objects and much more, but since 2014 this project has been considered closed and everyone is strongly advised to move to the cloud, where all its main functionality has been transferred:

Therefore, today it makes sense to talk exclusively about [email protected]. To begin with, let me remind you that a little earlier I described several popular ones in RuNet. cloud services, each of which is quite competitive (follow the links provided you will find them detailed description):
- - a wonderful service (the founder of other clouds), which stores not only files, but also the history of their changes (this option seriously helped me out once). True, they only give about two gigs for free, although you can different ways become more sophisticated by expanding them to sixteen. On a paid tariff they give you a terabyte, but in exchange they ask for a hundred evergreen pieces of paper per year (some kind of chaos).
- - on free account there is a limit of 10-20 Giga, which again will have to be obtained in various unnatural ways. I mainly use it to transfer some files (folders) by sharing, or to upload some things for downloading from the site (Dropbox in this regard is picky about the amount of traffic generated when downloading).
- — as in Dropbox, the history of document changes can be saved in the cloud, and a huge number of file types can be viewed without downloading them to your computer. By default, it offers fifteen gigs for free (although they will be shared with Google photos). There you will also find an online office (what used to be Google Docs) if you want to create and edit documents online.
- - the brainchild of Microsoft. Mere mortals are provided with seven gigs of joy, and for owners of licensed eights - twenty-five. Among the features we can note is the complete analogy of the online office, which is called Office Web Apps, as well as the ability to receive from the Internet remote access to the computer where you have the cloud application installed.
Kindly skipping ahead and presenting the competitors, I think it’s time to review the capabilities of the web interface of this cloud, its program for installation on a computer and the Mail.Ru Cloud mobile application. The set is generally standard, and the capabilities of this service are somewhat similar to those already described by direct competitors.
However, a year ago there was a promotion in Mail, in which many were able to get one terabyte of free space in the cloud just for installing mobile client and connecting it to your account. Therefore, in RuNet this service is very actively used, including for sharing something useful in narrow circles. In general, I like the corporation’s approach to business, and I noted this when I wrote about them. It’s not for nothing that, in total, all their resources occupy first place in terms of traffic on the RuNet.
Main characteristics of the Mailrush Cloud
So what:

As you can see, the history of file changes is not kept here, which means you will not be able to restore the appearance of the file as it was a week ago. On the one hand, this is a minus, but on the other hand, in two years I have used this opportunity in Dropbox only once.
Online version of the file storage [email protected]
Cloud web interface quite simple and concise. There is nothing superfluous or distracting. Personally, I like it more than the competitors’ options (the designers and usability engineers did a great job).

There are two tabs at the top: “Cloud” and “Sharing”. The first tab opens by default, and you will find a description of the second in the video above (there you can share one of the folders with your friends or colleagues and allow each of them to either only view the contents, or give them the ability to edit it). Let's go over interface of the “Cloud” tab:
Mail.Ru Cloud - programs for working with disk
Actually, let’s now just talk about working with the desktop and mobile version“Mail.Ru Cloud” and let’s go for a run. Let's start with the computer. You can download the program for Windows using the link provided. The installation wizard is completely “typical”. After installing the program [email protected] you will be asked to provide your username and password for account Mayla:

If you entered everything correctly, then next step you will be offered to change your place of residence if you wish folders [email protected] , which will subsequently be synchronized with the cloud. Please note that its size will be equal to the size of the files stored on the virtual cloud disk, and can reach 25 Gigabytes (and in my case, up to a hundred).
Default this folder It is proposed to create it on the “C” drive, which is not acceptable for me personally, because I periodically create its image with Acronis and the extra gigabytes there are not a problem for me at all.

Traditionally, after installing a program, its icon will appear in the tray, by clicking on it with the left mouse button you will be taken to this very shared folder, which will synchronize with the cloud. Well, what about the menu? right button will allow you to perform a number of important and not so important actions.

For example, if you work with the same cloud from Mail from several computers (you are allowed to connect up to five of them), then different users will probably have their own folders that there is no point in synchronizing for everyone else. For this setting, use the menu item "Select folders". In the window that opens, simply uncheck those folders whose contents you do not need to synchronize on this computer. If anything happens, you can play everything back simply by returning the checkboxes to their place.
you no longer need to open the cloud.mail.ru service in your browser, but simply copy it to a folder [email protected] the necessary objects and they will immediately begin synchronizing with the virtual cloud disk. By the way, in context menu All your files and folders after installing the program, additional items will appear to help in this difficult task:


Well, it’s like a desktop program and I don’t know what else can be said. Quite simple, visual and understandable. Let's see if things are going well with the application for mobile devices.
Mobile application Cloud Mail.Ru
I installed it on the iPad, so I’ll talk about it. It is installed from (search either by Cloud Mail.Ru or by Mail.ru cloud). Naturally, you will again have to enter your username and password for your account.
After that, you will be asked if you want to automatically upload photos and videos from this gadget to the mailrush cloud.

If you agree, it will be automatically created in the root of your virtual disk folder "Camera Uploads", where all media files will begin to be copied immediately. Actually, this is exactly how I uploaded the screenshots given here to the computer. The thing is convenient.

The mobile application interface is again quite simple and well thought out. At the top right you will find a button for settings appearance displaying files in a window (again, you will be asked to select the notorious tile or list). There, by the way, it will be possible to configure sorting (alphabetically, by date, and in reverse order).

The button with a plus sign located next to it will allow you to add a new folder, as well as perform a couple more actions:

The left button on the top toolbar opens hidden menu, allowing you to perform a number of actions.

Forgot to mention that mobile app of course, because the first one’s memory, as a rule, is rather poor. However, some files can be stored on the gadget. The easiest way to do this is to click on the icon with an up arrow when viewing a file, but there is a universal way. In order to mock any file, just click on the letter “i” in the circle and in the window that has already opened, select the action you need (saving, sharing, moving, renaming, etc.).

There you can also configure shared access to the folder:
When viewing files in list mode, you can simply move the line with the object description to the left and access the same settings:
Naturally, files of many formats can be viewed directly in the application window (photos, videos, text documents and so on.). Well, that's all, I guess.
I was left with a very good impression of the usability of the service and applications under the general name [email protected]. If in the near future they also add the ability to collaborate with files, and also (dreams) add the ability to access the history of file changes, then I might be open to it file storage I’ll move from Dropbox (100 GB received from mailrush will completely satisfy me in size). However, I would appreciate hearing your feedback. Maybe talk me out of it.
Good luck to you! See you soon on the pages of the blog site
You can watch more videos by going to");">

You might be interested
ProtonMail - email with increased security and interface in Russian  Email on Mail - registration, login and creating a mailbox, as well as setting up folders and filters for inboxes on Mail.ru
  Email mail - registration, choosing an email address, how to enter your mailbox and how to view incoming letters on your page Email - where you can create it, how to register a mailbox and choose the best of the free Email services