Home media server– rich in settings, free application to provide public access and sharing files on PC Windows 7, 8 and 10 to other UPnP, DLNA, HTTP devices on the network.


It will turn out to be a convenient option for watching streaming television, radio broadcasting and local video on gadgets without additional steps of downloading and converting content, connecting flash drives and HDMI cables.
Home Media Server Features
Processes requests from client devices for movies, images and audio data, without playing or generating anything on its own. The program supports Smart TV, game consoles, media players, as well as mobile gadgets– almost any technology can be a full-fledged participant in a multimedia network. Endowed with a number of capabilities:
- converting content into the required format;
- adjusting video frame parameters;
- switching audio streams and supporting subtitles;
- redirection of online streaming;
- support for digital television;
- simultaneous launch on a group of devices;
- working with podcasts;
- remote control via WEB interface.
The home media server also provides an option for backing up the database and settings. May be useful in correcting errors in using the program and possible errors work.
Advantages of Home Media Server
The main advantages in comparison with similar products include:
- Absolutely free. None advertising banners and intrusive third-party software.
- Multifunctionality. A universal “harvester”, the potential of which knows no bounds.
- Trans coding support. Automatically detects and re-encodes unreadable source files in real time.
- Russian-language localization. Given the extensive functionality of the utility, it will be easier to understand the options in a clear language.
You can download Home Media Server for free for Windows 10, 8 and 7 operating systems using the link https://site/domashnij-media-server/ below, and a large number of settings and parameters will help users customize the application as accurately as possible.
Technologies are moving by leaps and bounds across the planet, expanding the boundaries of possibilities every day. Let's talk about one of them - a home media server, and how to configure it depending on the version of the operating system.
First, let's talk about what a home media server is and what it is needed for. In your search for information, you will come across DLNA technology - the acronym in English stands for Digital Living Network Alliance, the literal translation sounds like Digital Network Alliance. A technology that allows compatible devices on the same network (home, corporate, etc.) to exchange data in real time to play/view media content (music, images, video recordings of any size) - thereby creating a home media server. The network can be like wireless wifi, and wired Ethernet, devices are identified by IP address. Already in 2013, the alliance included more than 200 famous manufacturers digital technology, so the technology is supported by most digital TVs, smartphones/tablets and modern OS versions. Next, in more detail about the options for setting up a home media server using DLNA technology with step by step instructions. Let's start in ascending order of OS versions, starting with seven and then about third party means.
Built-in Windows tools and home media server
operating room Windows system provides for setting up a home media server using built-in tools, but it will take a little time and patience to set up home network. Since the principle of broadcasting is similar in the seven and ten, we will first set up the operating systems, and then move on to the content transfer itself and the creation of a home media server.
Windows 7 and home media server
A home network media server for Windows 7 can be configured for wireless network, and wired. Devices must be connected at the time of connection to home/ corporate network. So, step by step.
Go to “Open Control Panel” from Explorer, or “Start” panel → “Control Panel”;
Method 2
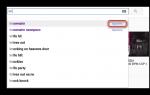
Now let's start the home media server from the TV, first turn it on.
on the TV remote control, press the button with the image of a house to launch smart services; 
scroll to the right to select “SmartShare”; 
Installation
After successful loading of the distribution, it will proceed to installation:
on the first installation screen you will be asked for the directory into which the unpacking will be performed; you can leave it unchanged, or you can change it; 
Next, the program installation directory will be indicated, which can be changed if desired, and you will also be prompted to “Create a shortcut to launch the program...” on the desktop → after selecting, click “Install” 
installation is complete and the program will ask you to launch the program → click “Yes”. 

Settings
Let's move on to setting up a home media server, below complete instructions:
When you first start it will open " Initial settings" Here you will be asked to select a device from the list, or check the “Automatic” box; you can also select a color main form from the palette; 
When you click “Next”, an information window with changes in versions will appear. 
Going to the main program window, select “Settings”. 
Select from “Category”
"Media resources":
here we put ticks according to the content that is located either on local disks, on either removable media;
“Add” button → select directories to add media resources and click OK. 
"Devices":
in this settings window, you can add or exclude devices by IP addresses, depending on your preferences, leave or uncheck the “ Automatic addition new devices" and "Allow access for new devices"; 
if you add a new device using the “+Add” button → a new settings window will appear with fields for indicating the name, IP address, setting a time interval to limit access, setting options according to content stars; 
When you click on the “Settings” button → an extended settings window will open with the ability to:
- instructions “Media resources”;
- fine-tuning file formats with video extension and number of image pixels;
- transcoder client settings;
After making changes, click “OK”
"Server"
Only for advanced users and system administrators:
d on the “Basic” tab - indicate the computer name, port, set the obstacle for the machine to go into sleep mode when the server is running; 
in the “Advanced” tab - you can specify the root folder of the HTTP server, as well as the use of a specific address to receive UPnP messages about discovering and managing devices on the network; 
in the “Web - navigation” tab - you can manage the default script or make changes to it; 
when you click “+Add”, a dialog box will appear with the ability to specify the name, IP address of the device, MAC address and server name, you can immediately check the IP address for a conflict in the network. 
"Transcoder" - exclusively for advanced users.
Section "Temporary files":
allows you to intelligently distribute the storage of temporary files and set a limit on the total volume in Gb, as well as enable an alert when a certain amount of data is reached; 
specify the buffer size excluding disk space; 
parameters for performing transcoding with fine tuning profiles indicating priorities, the maximum number of threads, as well as executable file resources, you can create your own profile; 
here the paths of the source and finished files with the transcoding profile are indicated. 
Starting a home media server
Individual settings according to preferences and needs have been completed, and now let's get to the fun part - demonstrating the capabilities of your media server.
The program window is divided into 3 parts:
Folder navigation is identical, select required file and start viewing, below is a screenshot.
Tz_mediasrv/screenshot_058
Tz_mediasrv/V002.mp4
Upon completion of work with the home media server, you need to stop the stream transmission:
in the main menu select “Stop”; 

click on the cross - close the main window → the system will display a dialog box with the question “Unload the program?” → “Yes.”
Enjoy watching!
Below is a guide on how to organize a DLNA server in the “ten” so that you can view streaming video on a TV and other equipment using integrated OS tools, as well as using special applications. In addition, instructions will be provided on how to work with the playback options on a PC or laptop.
In most cases, this is used to open a collection of videos that are stored on a PC via a Smart TV that is connected to the same network. In addition, in this way you can provide access to other content and various devices, which are capable of working with DNLA.
Stream videos without setup
In the "ten" you can use DLNA options to play content without setting up a DLNA server. All that is necessary in this case is that the device and PC are on the same network, which will allow it to work correctly. It is worth noting that in the network settings on your PC, you can enable “Public network” and disable data sharing, but the content will still be played.
You just need to right-click on the movie or directory with data and select “Bring to device...”. After this, you need to indicate what you need from the list. For the device to appear in this list. You need to connect it to the same network as your computer. As a result, playback will start specified file or several data in the player window.
Organization DLNA server and integrated means "tens"
To use “tens” as a DLNA server for third-party devices with this technology, you need to do several things: simple actions. Initially, you need to go to “Media Streaming Settings”. To find them, you need to use a search in the control panel or taskbar.
After this, you need to click on the “Activate online transmission of media content” button. A similar manipulation can be carried out in Windows player Media through the “Stream” item. Then you need to assign a name to the DLNA server and, if necessary, remove some devices from the list of allowed ones. Initially, all devices on the network can gain access.
Next, having specified the device, you can click “Configure” and set the type of content to which you will have access. It turns out that it is not necessary to create a group and join it. Having done everything necessary settings from TV and other devices you can provide access to data in the “Video”, “Music”, “Images” directories on a PC and play them.
It is worth noting that if the network type was “Public”, then with such manipulations it automatically becomes “Private Network” and network discovery is activated. It may be that network discovery is turned off in the "Advanced sharing settings", however, you can activate it in additional settings connections and the “tens” interface.
Adding a directory for the DLNA server
When activating a DLNA server with integrated Tens tools, there is one not very clear thing, which is adding directories so that they can be used on any device local network. This can be done with several manipulations.
The first step is to activate Windows Media. Then you need to right-click on one of the sections. For example, you need to add a directory with movies. In this case, you need to right-click on the “Video” section and select “Manage video library”. Then you need to add the required directory and that's it.
After these manipulations, the directory will be displayed for all devices with DLNA technology. However, there is one small nuance here. Some TVs and devices cache the list of available data, so you may need to reboot the device or restart the network to display it. It is worth noting that you can restart the server directly in the player in the “Stream” menu.
Setting up a DLNA server using third-party utilities
There are a huge number of applications that are designed to organize a DLNA server in Windows 7 and 8. But in fact, these programs can be used in such a situation. However, you can add one more application to this list, which appeared quite recently, but already leaves a positive impression of the work. It's called Serviio.
The application is distributed freely, but there are also paid version. However, the free edition has a wide range of functions for creating a DLNA server in the top ten. In addition, there are additional options.
Among them, we can note the use of online broadcast sources. Some of them require plugins. In addition, it is possible to transcode the file into the required format suitable for the device.
In addition, the program allows you to display subtitles, work with playlists and all popular media file formats. In addition, the application is able to sort content by type, artist, date. It turns out that while viewing you can conveniently move around the folder.
You can download the application from the official resource. After installing the application, you need to activate Serviio Console from the list of installed applications. Here you need to switch the interface localization and add the necessary directories with the required content. You can do this in the “Media Library” section. After this, everything is ready to go.
You can familiarize yourself with this application in detail after downloading it to your computer. But I would like to note that it is possible to turn off the DLNA server at any time. To do this, go to the “Status” section.
That, in principle, is all you need to know about how you can organize a DLNA server in the “top ten” to connect various devices to access directories with media files. In principle, even a novice user can cope with this.
I have already published more than one article on the topic of setting up DLNA. We launched a DLNA server different ways, on different devices, and for different TVs. In this instruction, I will show you how to enable a DLNA server in Windows 10. Let it be a computer or a laptop, it doesn’t matter. The main thing is that Windows 10 is installed on it. There are many different programs, with which you can run a media server on your computer. But in this instruction we will not use any third-party programs. We will use only standard Windows tools 10. By the way, this option is available in both Windows 8 and Windows 7. There are few differences there.
And so, first, let’s figure out what DLNA is, why run this server on a computer, laptop, and what to do with it. Everything is very simple. Using DLNA technology you can transfer media content (video, photo, music) between devices on the local network. Most often, this technology is used for viewing on Smart TV TV videos, or photos that are on the computer. I wrote in more detail about this technology in the article: . If interested, you can read it.
How it all works: The Smart TV must be connected to our router. By Wi-Fi networks, or by cable. It doesn't matter. The computer on which we want to run the media server and from which we want to play video, photos, or music on the TV must be connected to the same router. The main thing that devices were on the same local network (were connected through one router). This does not mean that there should be only one computer and one TV, there can be several of them. Moreover, there may be other devices on the network that support DLNA. For example: game consoles, TV consoles, satellite receivers etc.
Before proceeding with setup, make sure that your computer and TV are connected to your Wi-Fi network, or using network cable to the router. Check if the Internet works on the TV. If you don't know whether your TV supports DLNA, you can check the specifications for this information. I will say this, if the TV has a Smart TV, then everything will work.
And also in Microsoft browser Edge in Windows 10 has the ability to display videos, photos and music directly from the browser on TV. I wrote in the article how to do this.
I think we have figured out all the nuances, now we can start setting up.
Displaying video from Windows 10 to TV: a quick and easy way
A video, film, almost any video can be displayed from a computer to a TV in a few clicks of the mouse. Turn on the TV. Make sure it is connected to the internet (to your router).
On the computer, open the folder with the video, and right click click on the file that we want to play on the TV (Smart TV). Next, move the cursor to the “Transfer to device” item. Our TV should appear there. If it says “Searching for devices...”, then you need to wait a little. Leave open menu, or try again in a couple of seconds. As you can see in the screenshot below, Windows 10 found two TVs on me: LG and Philips.
Choose a TV. The player control window will immediately appear. In it, you can control video playback on the TV, add other files to the playlist, see information on the TV, etc.

The TV will immediately start playing the currently running movie.
We have just started watching video from a computer to a TV using DLNA technology. As you can see, everything works. And all this wirelessly, over the air. It's over if you have both devices connected via Wi-Fi.
Starting a DLNA server on Windows 10 using standard means
Above we looked at a method where you can send files to a TV from a computer. But there is still a great opportunity when we can view all files from the TV (to which access is open), which are stored on our computer. I think this is exactly what you need.
To start a DLNA server you can use third party programs, for example, "Home media server (UPnP, DLNA, HTTP)". I wrote about setting up using this program in an article. This program is suitable for all TVs. But each manufacturer, as a rule, has its own program. LG, for example, has this Smart Share. The setup I wrote about.
Well, on the other hand, why do we need third-party programs if everything in Windows 10 can be configured using built-in tools.
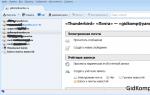
1 First of all, we need to open the “Media Streaming Options”. This item is located in the control panel. You can simply start typing its name in the search and launch it.


If your TV is not on the list, then wait a little. Or close and reopen your media streaming settings.

Next to each device there will be a "Configure..." button. If necessary, you can set individual settings for each device.


As you can see in the screenshot above, access will immediately be open to three standard folders: "Videos", "Images", "Music". You can view all the files that are in these folders on your TV.
These three folders are located at system disk. Agree, it’s not very convenient to copy the necessary films and other files there all the time in order to watch them from the TV. Therefore, you can simply share other folders.
How to add a folder for a DLNA server
Launch Windows Media Player.

If you want to add a folder with videos, for example, then click on the corresponding item on the left and select “Manage video library.”

In the new window, click on the "Add" button. Select the folder to which you want to open access via DLNA, and click on the "Add folder" button.

All, required folder will appear in the list and will be displayed on the TV. For example, I opened access to the “Video” folder in which I store films.

In this way you can add any folders or remove them from the list.
1 If you need to open your media streaming settings, you can do so from Windows Player Media. Just click on the "Stream" menu item and select "More streaming options...".

Several articles
If you found this article by direct search on the Internet, you probably already know what DLNA is and for the most part you are only concerned with the issue of setting up a DLNA server on Windows 10. More on this below, but for beginners, a small theoretical lesson.
What is DLNA
DLNA is an abbreviation for Digital Living Network Alliance. This term refers to a special software protocol with which compatible devices can connect to your computer's media library. This is a very useful technology that saves you the hassle of transferring files to other devices for playback. For example, you have a library of movies stored on your computer, but you want to watch some of them on your TV or tablet. Instead of copying a movie to a flash drive, disk, or transferring it via wire to a tablet, simply connect to your computer via the DLNA protocol. After this, media content (photos, videos or music) will be streamed over the network to high speed and without delay. To access the media library, DLNA uses UPnP (Universal Plug and Play) technology, which ensures compatibility with hundreds of a wide variety of devices without the need for complex additional software or drivers.
How to set up DLNA on Windows 10
Windows 10 includes everything you need to set up DLNA. You can make your PC a DLNA server or a client to connect to another server computer. The good news is that all this is configured and works without the need to download anything additional. In principle, there are many different DLNA servers, but for easy to use the average user will have enough basic Windows features 10.
To set up DLNA on Windows 10, you'll need the classic Control Panel. By the way, this instruction is suitable not only for Windows 10, but also for previous operating systems, such as Windows 8.1 or Windows 7.
By Windows default provides access via the DLNA protocol only to files and folders in standard libraries located on the C drive. Since few people store their media files on the system drive, it makes sense to include files and folders from your media disks or other partitions in the library. This is done as follows:
Find the folder you want to include in your media library. Right click on it and select Add to library. Depending on the content type, select Video, Images or Music. After this, all the content of the folder you selected, including subfolders, will be available to connected devices.
How to connect to a DLNA server on Windows 10
When everything is set up and ready, all that remains is to connect the end device on which you will play the content. It already depends on what operating system or the app you use to connect.
If you want to connect to the DLNA server from another computer, make sure both devices are on the same network. Then open File Explorer and click on the button Net in the left panel. A list of available media devices will open. Select your server in it, after which Windows will open Media Player with access to your media library. From it you can play videos, music or view photos. Everything is done as simply and conveniently as possible, so even the most distant users should not have problems connecting.
How to disable DLNA on Windows 10
- If you decide to turn off media streaming, open Network Control Center and shared access , and click on the link Change advanced sharing options.
- In a new window, expand the item All networks and then click Select media streaming options.
- On a new window Ban everything.
After this, connected devices will not be able to access your media library.