Almost every Macbook user has accidentally deleted some files at least once in their life. From a family photo to an extremely important document, files represent information on your drive that doesn't disappear once you delete it. There are many ways to return the necessary files. In today's article we will show you several such methods.
Checking Cart
If you have just recently started using a Macbook, you should know the following: when you click on the “Delete” item, the selected file is not permanently deleted, but placed in the Trash. In order to finally delete some files, you must then visit the Recycle Bin and empty it yourself. However, there is a key combination that can be used to immediately delete selected files, but today we are not talking about it. Typically, the Trash is located at the end of the Dock. Click on it right click mouse and select "Open". In front of you you should see all the recently deleted files if you did not empty the Recycle Bin.
Checking other carts
If your files were stored on an external USB storage or disk, such places have their own versions of Recycle Bins, which you can check for deleted files. By default, they are hidden from users' view, so you will need to do a little work before you can access them. When you use an external drive, your Macbook creates a heap hidden folders, which begin with a dot to help the drive work better with the macOS operating system. Just one of these folders is “.Trashes”, which contains deleted files from an external drive.
How to enable display hidden files in OS Sierra and higher
If you're using macOS Sierra or something newer, you can turn on hidden files in the Finder by simply using the SHIFT+CMD+ key combination. ( last character represents a point).
How to enable showing hidden files in old version OS X
You can enable the Finder to show hidden files by running certain commands in the Terminal. Press the Command+Space key combination and type “Terminal” to open the latter. Next, execute the following two lines in the Terminal:
- defaults write com.apple.finder AppleShowAllFiles TRUE
- killall finder
After running the above commands, you should see a ".Trashes" folder. It is in this folder that you can try to look for previously deleted files. Additionally, you can empty this folder through the Finder if you need some space on your USB storage or disk.
To disable showing hidden folders, you will again need to run a couple of commands in the Terminal. Essentially, everything is the same, but we just change the value “TRUE” to “FALSE”. Run the following in Terminal:
- defaults write com.apple.finder AppleShowAllFiles FALSE
- killall finder
Using the Disk Drill utility

It would seem that you used a key combination or emptied the Recycle Bin - the files are lost forever. However, after performing such actions, deleting files from the disk does not occur immediately. Instead of immediate removal, the operating room macOS system marks these files as free space, i.e. your data is still on the system until it is overwritten by something else. This fact means that if you use the right software, you can recover deleted files, but only if very little time has passed since they were deleted.
Disk Drill is one of such software. This program scans your drive for files waiting to be overwritten and restores them. However, it's worth noting that any data you put on the drive after deleting files that were important to you could potentially have already overwritten them. Do you see what we're getting at? You will have to download Disk Drill to another computer and install it on your external USB storage. The last thing you want is for your important files to be overwritten by a file recovery program.
When you first launch Disk Drill, you will be asked to select required disk and perform a scan. Select OS X if you want to scan your main drive. The scanning process itself may take a few minutes, but upon completion you will be presented with a list of all recently deleted files. Many of them are pure junk and of no use to you, but if you know what to look for, use the sorting modes to simplify your search.
Once you find necessary files, right-click on them and select the “Recover” option, then select the directory where you want to place the files. If everything goes well, the selected files will appear in the selected directory. We remind you once again: the sooner you start recovering deleted files, the higher the chance of success will be.
Found a typo? Select the text and press Ctrl + Enter
Below is a list of free Mac data recovery software available on the Internet. These five applications differ in their characteristics. However, they all have something in common, they are free and therefore useful for the average user.
1. Disk Drill
Disk Drill Basic is the free version of Disk Drill. This application, in addition to the ability to preview recovered files, contains many additional functions, such as Recovery Vault and Guaranteed Recovery, which make it one of the best apps recovery Mac data.
Recovery Vault- this is essentially an additional layer to the Trash folder that stores a link to deleted data.
Guaranteed Recovery is a background service that saves a copy of every file sent to a user-specified folder. Both utilities significantly reduce the likelihood of losing important data.
Disk Drill can recover data from internal and external hard drives, USB flash drives, SD memory cards, and many other devices that can be connected to a Mac, including iOS and Android devices. His latest version has an extensive database of file signatures and uses very effective scanning algorithms.
Additionally, this app also offers a disk imaging feature, giving the user the option to work with a cloned version of the device/partition without compromising the original source.

Disk Drill in a popular publication
The user interface is very intuitive and Pro version includes efficient support service and the option to purchase a lifetime upgrade that covers all future versions. Overall, Disk Drill is an excellent application and will suit both casual and professional users. corporate users, and the upgrade is really worth the money spent on it.
is not the most powerful free Mac data recovery tool, but it has the advantage of coming with open source code. This means that not only the application, but also its source code is available to users.

PhotoRec can work with OS X, Linux, Free BSD, Net BSD, Open BSD and Windows. It allows you to recover the most common file formats such as JPEG images, MP3 audio files, OpenDocument files and Microsoft Office, PDF documents, HTML pages and ZIP archive files. Files can be recovered from different devices such as digital camera memory cards, USB flash drives, hard disks and CD-ROM.
This free application recovery Mac files uses a powerful technology known as file carving. This method consists of two stages. First, it looks for the data block or cluster size. If the file system is not damaged, this value is obtained from the superblock (ext2/ext3/ext4) or boot entry volumes (FAT, NTFS).
If this is not possible, the application checks each sector of the device and, using the first ten files found, calculates the block or cluster size. Secondly, the application reads the device, block by block/cluster by cluster, checking the different file signatures available in the application database, thereby collecting and recovering the available files.
Overall this is good tool, if you need to recover some personal files without resorting to a professional application.
3. EaseUS Data Recovery Wizard
EaseUS Data Recovery Wizard is one of the best programs to recover Mac data. The developer has released three different versions: Free, Professional and Unlimited version. The free version allows you to recover a maximum of 2 GB of data.

This free Mac data recovery app can recover data from Mac laptops, desktop computers, hard drives, USB drives, SD cards, digital camera memory cards, etc. It works on internal drives supported by HFS, as well as on FAT/FAT32 file systems used in USB flash drives and external hard drives, which can be connected to Apple computer. This application recovers file formats that are used in images, videos, music, and document files.
Designed to recover accidentally deleted files or files lost due to disk formatting, it also covers cases of data corruption resulting from a power failure or removing the device without first turning it off.
To sum it up, EaseUs free data recovery tool is a handy app for accidentally unintentionally deleting files.
#4. Softtote Mac Data Recovery
It's free software Mac data recovery has the advantage that it is offered without any restrictions and includes free technical support.

Can restore lost files from internal and external hard drives. File types include Canon, Fuji, Nikon and the most common Kodak image files. It works on devices with file systems NTFS, HFS/HFS+, HFS Wrapper and FAT. The app has the ability to view details such as the size of the image and the date it was created. It also provides the ability to select files to recover.
In short, Softtote can be included in the list of the best Mac data recovery software and although it is not that well known, it is worth a try in case of accidental file loss.
#5. MiniTool Power Data Recovery
This Mac data recovery software has a personal use version that is free to use on one computer only and has a maximum recovery capacity of up to 1GB. Commercial, enterprise and technical versions are also offered.
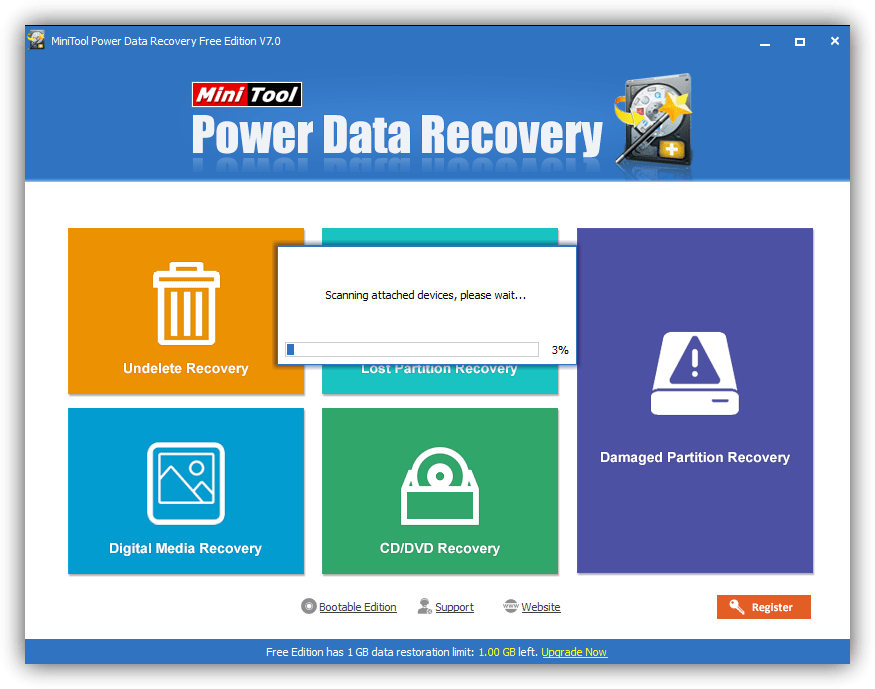
Allows you to recover photos, music, videos, email, documents and other types of data with Mac computers or other commonly used storage devices. Free version Only supported by email.
This data recovery software for Mac works in four different modes. The first one, Undo Deletion, can be used to quickly recover lost data due to accidental deletion. The second, Damaged Partition Recovery, recovers lost data from existing partitions. The third, Lost Partition Recovery, recovers lost data from lost or deleted partitions. Finally, the Digital Media Recovery mode recovers multimedia files from portable storage devices.
The most terrible situation for any computer user is the loss of data due to their deletion or damage. hard drive, formatting the storage medium, etc. Depending on the situation, you can use different ways data recovery in Mac OS.
Search in Cart
Photo: recycle bin icon on desktop
If the information was recently deleted and the trash was not emptied, then it is easy to return it. On Mac OS, the Trash is located at the very end of the Dock. Physically, each user has their own shopping cart, like invisible folder. Until it is cleared (Empty Trash), any file from it can be recovered.
To return data you must:
- open the Tpash window by clicking on the icon;
- find the required file among the icons of deleted files;
- drag the document outside the trash can.
If deleting a document was the last action when working in Mac OS, then you can return it with the keyboard shortcut and Z. This shortcut keys to undo the last action. The file will be returned even if the trash can is closed.
Time Machine function
Mac OS developers have created a universal tool that can return any file that existed in operating system. Time Machine creates hourly backup copies of all changing data, including the operating system.
The peculiarity of the program is that the first time it is launched, it creates a complete copy of the hard drive, which takes a lot of time. After that, every hour it copies only those files that have changed. Thus, you can find the date of deletion or modification of a file in the program timeline, select it and click the button to return it. No reservations are made until the program is activated.
The graphical interface is presented in the form of a scrolling catalog of backups, a timeline on the right and the main interface at the bottom of the screen. It’s easy to use and you can return absolutely everything. But you need a large hard drive or removable media. When the storage is completely full, data replacement begins, so some of the oldest changes may no longer be returned.

Photo: Data recovery in the program
Data recovery programs
A universal tool for returning deleted or damaged data is special programs.
Programs for data recovery from hard drive Mac drive OS have several features:
- If a graphical interface is implemented for ease of use, then the application is paid. The cost can vary from a few dollars to several hundred;
- the quality of information recovery varies, as different algorithms and methods are used;
- It is possible to successfully return information in 90% of cases. Difficulties arise when working with images, but there are separate applications for them;
- Using the demo version, you can evaluate the ease of use of the application and the quality of data recovery. Many people will need the functions of restoring data after emptying the recycle bin, as well as creating a backup copy;
- To work with objects up to 5 MB, you can use free demo versions.
The range of programs is quite large. Among them there are several that are the most versatile and easy to use.
Video: Working with disks in Mac OS
PhotoRec
This utility is designed to recover image files, videos, documents, archives, etc. from memory cards. It works with various file systems and operating systems. The peculiarity of PhotoRec is that it does not have GUI. This free application does an excellent job of recovering data after formatting a memory card, even retrieving what was long deleted.

Photo: General view program window PhotoRec
Data Rescue
Another easy-to-use data recovery program is Data Rescue. The application does not try to restore the file system, but simply retrieves from the hard drive, external USB and Flash drives, and memory cards those objects that can be read. Great for recovering recently deleted files and any other information from a disk.

Photo: Stage of choosing a working method (mode)
To work with the program, you need to launch it, select the media type ( HDD), decide on the search mode (Fast, Deep, For deleted files or Cloning to create a copy of data from disk on working media). Next, you need to wait a while: for deep scanning, 1 minute per 1 GB.
The program will display a directory of recovered data in the form of a tree. It is easy to find the necessary pictures and documents. After checking the box, saving, or rather restoring them, starts. Some file types allow you to preview them before saving them.
FileSalvage

To recover deleted files damaged by software various reasons, and also after formatting the system or disk, the FileSalvage program can be used. It has the ability to work with different media and recovers files of many formats. Works especially well with video and image recovery.
Recovering deleted files on Mac with Disk Drill
A Disk Drill utility is released specifically for the Mac OS platform, which can recover data after it has been deleted. Works with all major file types, with native media, removable data storage devices (Flash, memory cards.).
Available in 4 variations, the most common of which are basic and professional.
The optional Recovery Vault feature allows the program to create backup copies, simplifying the recovery process. In addition to its own bytes, the information on the disk has a header - meta-data. They store information about the name and size of the file, its location on the media, etc.
By deleting it is the meta part that is erased. Recovery Vault saves exactly the meta part.

To restore, you need to launch the application window and select the scan type. If a little time has passed since removal, you can use quick search, in other cases – deep. Scanning can be interrupted at any time, with or without saving its results. From the list of found files, you need to select the necessary ones and start their recovery.
Getting a file back on Mac OS is not difficult. It is advisable to install in advance special utility or a backup program. Otherwise, you will have to spend a lot of time purchasing specialized tools and full scan disk.
It is difficult to recover files after mechanical damage and if they were deleted a long time ago. The sooner the recovery operation begins, the greater the likelihood of success.
If you discover a missing document, you must immediately stop any work on the computer. This will reduce the chance of data being written over a lost document.
Disk Drill – relatively new program for data recovery, developed for two platforms - Windows and Mac OS X. Like any other recovery program of this class, it affects a wide range of devices from which the user can perform recovery: computer and laptop, Windows and Mac, phone and tablet, HDD (SSD) disk or flash drive, etc.
Latest on this moment recovery utility version, Disk Drill 3.0, compatible with all operating systems starting from Mac OS X 10.8.5+. By the way, the recently released Sierra is fully supported. As for the Disk Drill for windows edition, all functions are identical to those of Makov. The latest release is called Disk Drill 2.0 for Windows, available for Windows XP and higher (Vista / 7 / 8 / 10).
Key Features of Disk Drill
We'll consider key features programs that are equally relevant for all three versions of Disk Drill Pro / Basic, Disk Drill for Windows and Mac OS X.
Recover all file formats and systems
If the developers are not lying, then they Disk program Drill is capable of recovering over 300 file formats from ashes. Including:
- photos in JPG, PNG or TIFF, pictures AI, PSD and INDD
- video files - AVI, DV and MP4
- music files (AIF, MP3 and WAV audio)
- RAW images– CR2, NEF or DNG
- documents in DOCX format, PPTX and XLSX (thus, the Disk Drill functionality allows you to recover damaged Word and Excel files).
As for file systems, Disk Drill can read and scan file systems of the following formats for remote data: HFS and HFS+, FAT/FAT32/exFAT, NTFS or EXT3/EXT4. Essentially, this suggests that you can attach any data recovery device to your PC or MacBook. In addition, if you use the Deep Scan option, volumes with a missing or damaged file system may also be able to detect something.
Available scan modes and recovery types
Quick SSD/HDD Scan
Disk drill's quick disk scan mode allows you to return files to your Mac along with their metadata, names and locations. If you recently deleted files, then this is perhaps one of the best recovery options before you formatted the HDD or overwrote a lot of files, which reduced the chances of correct file reconstruction.
SSD/HDD deep scan
Despite the fact that a deep scan of the HDD will take more time, this mode, built into the disk drill application, allows you to “dig out” what was not possible in other cases. The point is that some files may be damaged, and this requires a careful search for them in the file table. Say, if the system does not read the memory card at all, in Disk Drill you can understand whether it is possible to return the file table or not.
Return of protected data
For Mac computers, this is probably one of the best options, if you installed the Disk Drill program before deleting important files, and the Vault and/or Guaranteed Recovery options (they are responsible for saving data on the disk) were already activated within the program.
Universal search and recovery of hard drive partitions
This function allows you to recover mac partitions formatted in HFS+ or NTFS. Fat32 file system support is also available. In all cases, Disk Drill works at a low level with disks as binary elements, quickly scans the disk and looks for signatures, known partition headers. This function is extremely necessary for recovering partitions on a hard drive or SDD Macbook Air/Pro.
HFS+ recovery
The Disk Drill application comes with 3 SSD recovery modules that were created specifically for HFS+ partitions:
- reconstruction of HFS+ directories
- search for deleted HFS+ partitions
- HFS+ extraction
Everything works very quickly, efficiently and brings Mac OS X back to normal.
Supports all storage devices and devices
You can connect a specific device and restore it in a few minutes. In addition to desktop solutions, Disk Drill successfully copes with iOS (there is a function iphone recovery) and, of course, Android phones, tablets. By the way, we have already written about the wondershare dr fone program.
The free version of Disk Drill can scan virtual and hard drives - including Macintosh hard drives, external HDDs and SSDs, digital cameras, iPhones, iPads, iPods, Android phones, USB flash drives, Kindles and memory cards.
Disk Drill is great for beginners
Most likely, you will not have any questions as you use the disk drill application. Just click on the restore button - the program will do all the operations for you.
In fact, there is no need to spend hours exploring the functionality of the program; it has a built-in step-by-step wizard that will guide you through the necessary steps in a simple manner.
Additional programs for optimization as part of Disk Drill
The program package includes the so-called. additional package free disk tools (Extra Free Disk Tools Disk Drill), designed more for home users, but not for professional experts. You can optimize Mac OS X and reduce its size, find duplicate files on your hard drive, perform backup copy, check the status of your SSDs and hard drives, etc.
What tools does the Disk Drill program offer as a significant bonus? These are several free optimization programs useful for comprehensively maintaining order on a computer or laptop:
- Disk Health – checks SMART indicators, as well as disk monitoring. All this together will prevent disk failure.
- Optimization program Mac Cleanup and Duplicate Finder - analysis of the hard drive on Mac OS and search on it junk files, the removal of which will only benefit and free up space on SSD drive
- Recovery Drive - creation bootable flash drive for subsequent recovery of Mac OS X using Disk Drill tools
- Data Backup – creating a mirror (byte for byte) copy of a disk or partition on an SSD for data reconstruction
Summary. Thus, Disk Drill is another program for recovering files on SSD and HDD (see analogues), positioning itself as a universal solution for both Mac OS X and Windows. As already noted, there is a Pro version that works without restrictions, while the Basic edition allows you to recover up to 2 GB of files.
Good day friends. I decided to write a help article for those who have somehow lost their data on a flash drive or disk. This article will only talk about the Mac operating system. Information on recovering files from a flash drive and on an operating disk Windows system you can find it on the Internet. There is a lot of such information, but very little on Mac OS.
There are quite a lot of programs on Windows that recover data from flash drives and disks, and many of them are free. The same cannot be said about Mac OS. For the latter, there are only a few programs that are guaranteed (well, maybe 90%) to be able to recover your data, unless, of course, your laptop burned out and a hammer didn’t fall on the flash drive.
Programs for data recovery from flash drives and disks
1. Disk Drill
The most famous program in the business for Mac OS and perhaps the most effective. At least judging by the reviews of Mac users, the official website of this program and just people on the Internet. Disk Drill works with laptops MacBook Pro, Air, iPod, Mac Mini and iMac. This infidel program works with both HDD and SSD. As for flash drives, this is generally Disk Drill’s strong point. SD Card, XD Cards, regular Compact flash, MMC Card and many other external storage media are restored by this program. And what’s most interesting: a very small percentage of non-recovery, when many other programs have a fairly high percentage (especially in programs for Windows). One gets the feeling that Disk Drill would recover data even from a lost flash drive (this would be very relevant :)))
2. R-Studio
A good program for recovering data on hard drives and external HDDs and flash cards. The program works with almost all known file systems (FAT12/16/32, NTFS and others). Reviews about this program are not bad (I haven’t seen any bad ones). Not the most popular program, but perhaps just not well-promoted (unlike disk drill)
3.Mac Data Recovery
Not bad and besides FREE program for data recovery external media and HDD/SSD drives - Stellar Phoenix Macintosh Data Recovery. Works with any media and any data formats. Restoring files from a flash drive with Macintosh Data Recovery is a pleasure, since, in my opinion, it has the most ideal interface.
4. Data Rescue
Disk recovery is always an unpleasant story, scary, because you don’t know whether you can recover everything or not. Data Rescue is an excellent program for recovering data from a damaged system. If you are covered Mac system OS, then the most important thing in such a situation is to save important files from the disk, and not the system itself. The system can be reinstalled.
Well, actually, I can’t offer any more candidates for data recovery on Mac OS and flash drives, since I don’t know other programs. In the comments you can write programs that you have used and that really helped. All the best.


